

 12 October, 2026
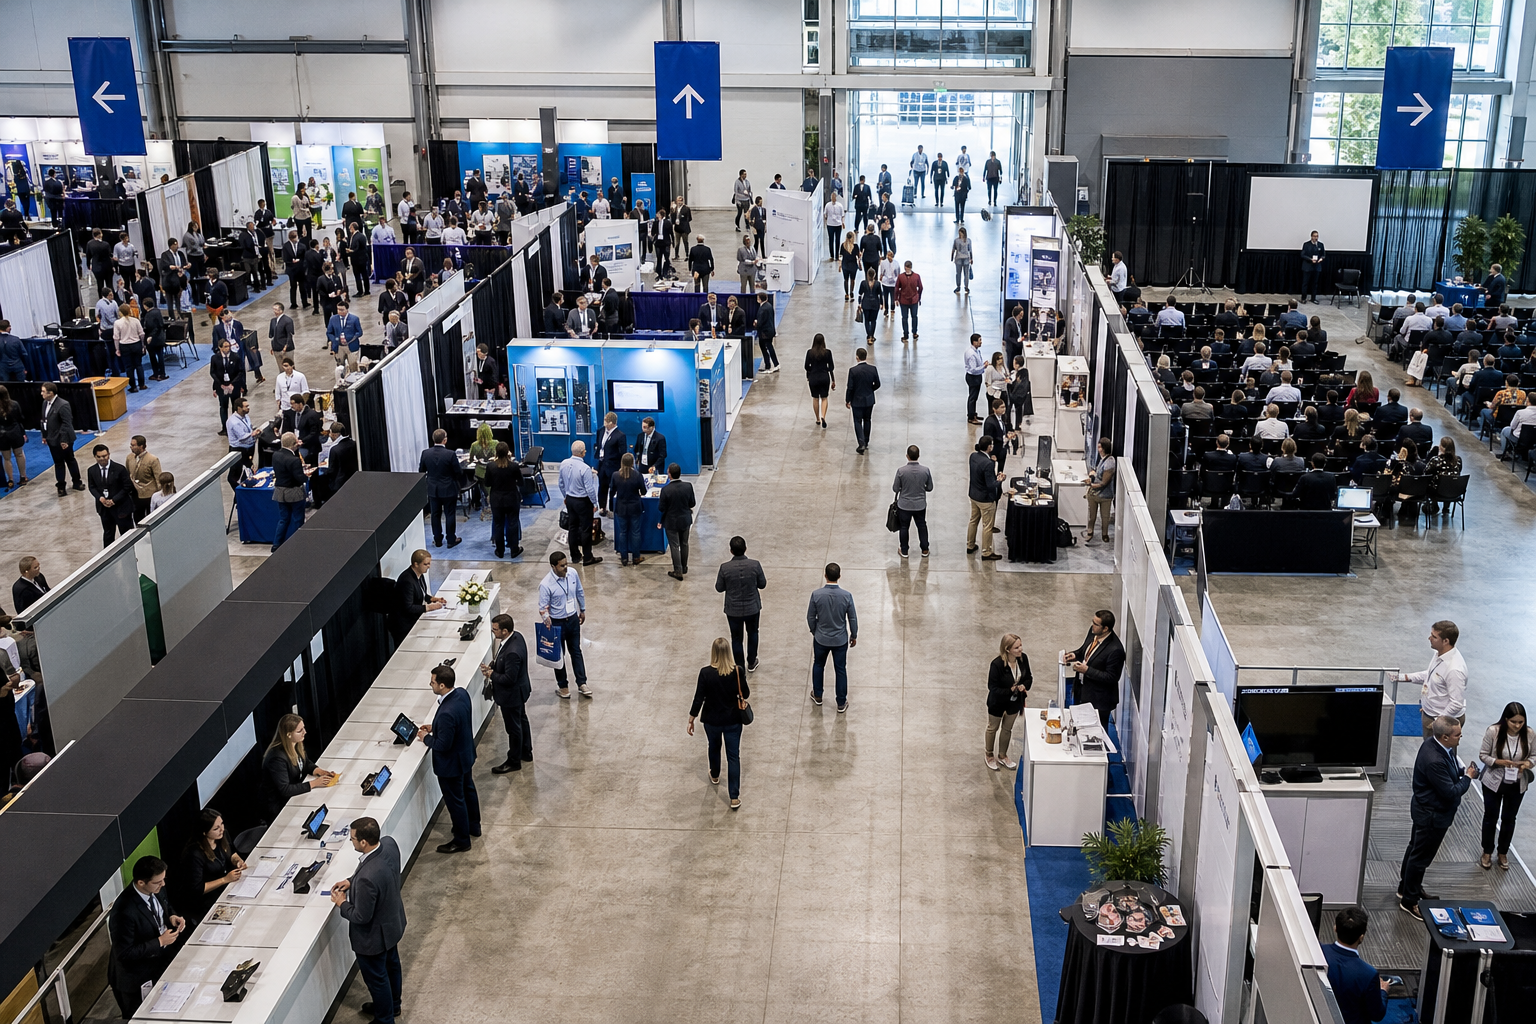
 The strongest trade show floor plans are designed around movement before booth sales. Start with attendee objectives, entrances, exits, primary aisles, accessible routes, registration, and program areas. Then place exhibitors where they can be seen without creating queues, dead ends, or blocked sightlines.
This approach gives organizers a practical layout to review with exhibitors, venue teams, production staff, and relevant authorities. It also balances commercial goals with safety, accessibility, technical access, and a comfortable visitor experience.
1. Define the Event Objectives and Physical Constraints
Before opening a floor-plan tool, write down what the event must achieve. A product showcase may prioritize demonstrations and dwell time, while a career fair may need fast circulation and clear employer identification. A conference exhibition may need strong connections between seminar rooms, food service, networking, and booths.
Separate working assumptions from confirmed requirements. Record expected attendance by time period, exhibitor count, booth sizes, sponsor commitments, demonstration equipment, registration volume, presentation schedules, food and beverage locations, storage, loading access, power needs, and building restrictions.
Also map the arrival experience. Decide whether attendees enter through one registration point or several, where queues can form without blocking circulation, and how visitors will find restrooms, stages, lounges, and emergency exits.
2. Build the Floor Plan Around Essential Zones

Think of the plan as connected zones rather than a collection of booths. Each zone should have a purpose, an owner, and enough space for the people and equipment it serves.
| Zone | Planning purpose | Questions to resolve |
|---|---|---|
| Entrance and registration | Welcome visitors and manage queues | Where can lines form without blocking an exit or main aisle? |
| Primary aisles | Move visitors between major areas | Do they create a readable loop with no dead ends? |
| Secondary aisles | Connect booth rows | Can visitors enter and leave each row comfortably? |
| Exhibitor booths | Support displays and conversations | Are dimensions, adjacencies, storage, and power confirmed? |
| Stage or seminar area | Deliver talks and demonstrations | Are seating, sightlines, sound, and technical access protected? |
| Networking and food areas | Encourage dwell time | Will queues or tables interrupt circulation? |
| Operations and storage | Support staff and equipment | Can staff reach the area without crossing visitor bottlenecks? |
| Exits and accessible paths | Maintain safe, inclusive movement | Are routes clear, connected, signed, and available throughout? |
Keep essential services visible but away from the busiest crossroads. Registration, food service, and demonstrations all attract people, so placing them together can send queues into nearby booths.
3. Plan Aisles First to Prevent Bottlenecks
Draw the primary circulation loop before adding booth rows. It should connect the entrance, major exhibitor areas, presentation spaces, networking zones, and exits in an intuitive sequence. Secondary aisles should branch from this loop without creating narrow pinch points or forcing visitors to retrace their steps.
Use sightlines to help people understand the room. Visitors should be able to see a destination, landmark, or sign from the main route. Avoid placing tall structures, queues, hanging features, or demonstration crowds where they obscure the next decision point.
Test the plan against opening rushes, lunch periods, popular presentation endings, and late-session departures. If one aisle receives all the traffic, add another route, move the attraction, widen the decision area, or stagger programming.
Do not treat a generic aisle measurement as automatic approval. The Ontario Fire Code provisions cited for certain two-exit conditions specify a minimum clear aisle width of 1,100 mm, with subsidiary aisles of at least 900 mm in the stated circumstance. Requirements depend on occupancy and layout, so have the venue and relevant fire authority review the actual plan.
4. Place Booths for Visibility, Balance, and Useful Adjacencies
Place anchor exhibitors, sponsors, or high-interest brands where they distribute visitors rather than pull everyone into one corner. A strong destination at the far end of a clear aisle can encourage exploration, provided the route does not pass through a registration queue.
Group exhibitors when the relationship benefits visitors, such as complementary suppliers or related product categories. Avoid putting every popular brand together. A balanced mix gives smaller or newer exhibitors more opportunities to be noticed.
Match each exhibitor’s activity to its location. A quiet meeting booth may suit conversation-led displays, while a live demonstration needs audience space, safe equipment placement, and protection from passing traffic. Confirm booth dimensions, power, suspended elements, storage, and adjacency requests before publishing the layout.
Before finalizing booth placement, confirm whether the venue supports customized trade show floor plans that accommodate exhibitor needs, attendee flow, and presentation areas.
5. Integrate Stages, Seminars, Demonstrations, and AV
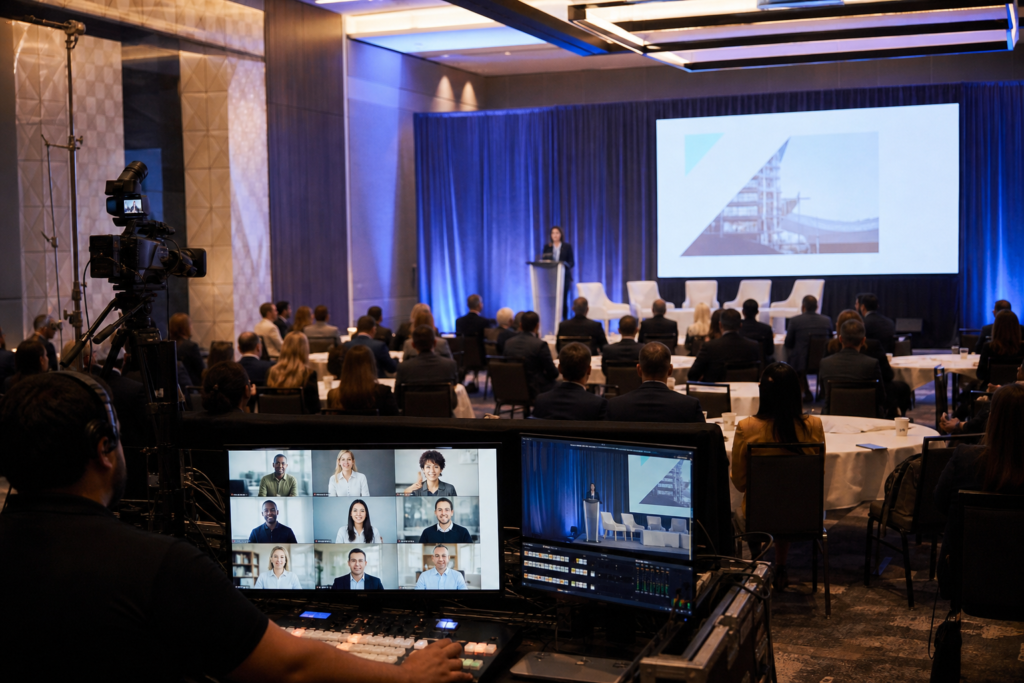
A presentation area is not just a stage rectangle. It needs audience seating, clear screen sightlines, speaker movement, microphone access, lighting, sound control, and a technical route that staff can use without crossing the audience or blocking booths.
Place screens so they are readable from every planned seat, and avoid directing the audience through active exhibitor rows. Consider sound spill too. A loud demonstration beside a seminar can reduce the value of both areas.
A strong layout should account for the conference AV setup, including screen positions, speaker sightlines, microphones, and technical access. Prepare a room plot showing equipment positions and signal routes, then connect it to the run of show. Rehearse speaker changes, demonstrations, microphone handoffs, and transitions.
Confirm equipment storage, cable protection, power requirements, control positions, network needs, and access routes. Do not assume a standard venue package includes every connection, outlet, rigging point, or network service required by the program.
6. Review Accessibility, Egress, and Operational Safety
Accessibility belongs in the first sketch, not as a correction after booth sales. Connect the entrance, registration, booths, stages, food areas, restrooms, and exits with clear paths. Keep queues, displays, furniture, waste bins, and promotional signs from narrowing those routes.
Ontario’s accessible-events guidance recommends paths connecting attractions and essential services, including at least a one-metre-wide path of travel for people using wheelchairs or walkers. Use this as a planning reference and confirm the requirements that apply to the venue and event setup.
Review emergency exits, fire equipment, doors, staff-only areas, and evacuation routes with the venue. A plan is not ready if a booth, queue, sign, storage case, or cable obstructs a required route. Organizers should also avoid representing the venue as the authority responsible for every fire, accessibility, or electrical approval.
7. Choose a Venue That Can Support the Plan
Venue selection affects the floor plan before you draw it. Ask for accurate room dimensions, column locations, ceiling and door constraints, loading procedures, power, presentation support, parking, accessible routes, and the process for reviewing the final plan.
For larger exhibitions, seven flexible halls can make it easier to separate registration, booths, networking zones, and programming. Mississauga Convention Centre describes seven halls of approximately 4,250 square feet each, with total capacity exceeding 2,200 guests across the venue. These figures are venue-wide context, not a guaranteed booth count or event capacity.
The Centre also states that it supports trade shows ranging from smaller industry events to large shows with hundreds of exhibitors and thousands of attendees. Ask the venue to test your actual exhibitor count, attendance pattern, booth specifications, stage requirements, and accessibility needs.
Mississauga Convention Centre is located at 75 Derry Road West, near major highways and Toronto Pearson International Airport, with approximately 700 on-site parking spaces. Confirm availability, traffic management, and loading arrangements for your specific event.
8. Finalize the Plan With a Coordinated Review
Use one controlled review process instead of separate versions for exhibitors, production, catering, and venue staff. Assign an owner to each decision and record changes so a late booth move does not block an exit, alter an AV sightline, or reduce an accessible route.
Start with the measured room shell, then verify zones, booth locations, aisles, exits, accessible paths, stages, technical positions, registration, signage, storage, and loading. Ask the venue which items require municipal or provincial authority review.
Issue a dated final plan to exhibitors and suppliers. Include the version number, booth identifiers, move-in timing, permitted equipment, delivery instructions, emergency information, and a contact for changes. Before doors open, compare the installed layout with the approved plan.
Trade Show Floor Plan Approval Checklist
- Objectives: Attendance assumptions, visitor goals, exhibitor mix, demonstrations, seminars, and networking priorities are documented.
- Measured shell: Dimensions, doors, columns, fixed features, loading access, storage, and service areas are verified.
- Circulation: Entrances, registration queues, primary aisles, secondary aisles, loops, and decision points have been tested.
- Booths: Dimensions, sponsors, adjacencies, attractions, demonstration space, power, and equipment needs are confirmed.
- Programming: Stage seating, screen sightlines, microphones, lighting, sound spill, technical access, and rehearsal needs are included.
- Accessibility: Connected paths to essential services remain clear, signed, and usable.
- Safety: Exits, fire equipment, emergency routes, aisle clearances, queues, and temporary structures are reviewed.
- Operations: Signage, registration supplies, replenishment, staff routes, loading windows, and change control are assigned.
- Approval: The venue and relevant fire, accessibility, or electrical authorities have received the appropriate information.
Frequently Asked Questions
How wide should trade show aisles be?
There is no single width for every trade show. Requirements depend on occupancy, exits, layout, equipment, and local review. Confirm required clearances with the venue and applicable authorities.
Where should registration be placed?
Place registration near the entrance, with enough space for queues without obstructing primary aisles, exits, accessible paths, or nearby booths.
How do you place high-interest exhibitors without creating bottlenecks?
Distribute them across the circulation loop and provide enough audience space. Avoid clustering several attractions at the entrance or one narrow intersection.
What should a floor plan include for accessible routes?
Show connected, unobstructed routes between entrances, registration, booths, stages, food areas, restrooms, and exits. Check the installed setup because furniture and queues can reduce clearance.
How should seminar stages be integrated?
Protect audience seating and sightlines, provide suitable microphone and screen positions, manage sound spill, and give technical staff a safe access route. Link the floor plan to the AV plot and run of show.
Can a venue customize a trade show floor plan?
Many venues can adapt layouts, but the scope depends on the room, event requirements, building restrictions, and approval process. Confirm dimensions, accessibility, safety, power, loading, and technical support before selling space.
Conclusion: Approve the Plan Before You Sell the Space
Trade show floorplan best practices begin with circulation, safety, and accessibility. Once those foundations are fixed, place booths to distribute attention, connect complementary exhibitors, and support the visitor journey. Then integrate presentations, demonstrations, networking, registration, and operations so each area works without competing for the same route.
The final plan should be measured, version-controlled, reviewed with the venue, and checked against applicable fire, accessibility, and electrical requirements. If you are planning an exhibition or business expo in Mississauga or the GTA, discuss your event requirements and customized layout needs with Mississauga Convention Centre.