Trade show booth planning tips are practical steps that define goals, choose the right layout, and align staffing, AV, and logistics for measurable results. At 75 Derry Rd W in Mississauga, exhibitors use these tips to improve lead quality, reduce waste, and create a clear run-of-show that teams can execute confidently.
By Preet Dass — Mississauga Convention Centre
Last updated: 2026-06-15
Quick Summary
A winning booth plan sets one objective per audience, picks a layout that matches interactions, and scripts staffing, demos, and follow-up. Lock power, internet, and AV early, map storage and line flow, and rehearse. Document everything in a one-page run sheet so anyone on your team can execute under show-floor pressure.
This how-to guide brings venue-side experience from Mississauga Convention Centre to your next exhibit. You’ll learn to connect objectives to design, avoid common floor plan traps, and coordinate AV, catering, and lead capture without last‑minute scrambles.
- 13-step playbook you can copy
- Comparison table of booth formats and layouts
- Buying guide: tools, supplies, and vendor checks
- Troubleshooting for power, traffic, and staff flow
- Advanced tips from large-hall operations
We’ll reference real services you can leverage on-site—AV, staging, diverse in-house catering, and large loading access—so the plan you write today works in the hall tomorrow.
Before You Start (Prerequisites)
Define a single measurable goal, audience, and core message before you sketch layouts. Inventory assets, confirm power and internet needs, and choose a must-win demo. Set timelines for graphics, shipping, and staff training. This preparation prevents mid-show pivots that cost time and momentum.
Great exhibits start with clarity. In our experience hosting hundreds of trade shows annually, teams that write goals first produce tighter designs and faster show-floor decisions.
Decide what success looks like
- One primary metric: qualified leads, booked demos, or partner meetings. Don’t chase three.
- Target dwell time: aim for 2–4 minutes per engaged visitor to enable a complete story.
- Audience tiers: prospects, current customers, and press require different plays.
Example: A GTA SaaS company exhibiting with us chose “50 scheduled product demos” as the sole KPI, then built all messaging and staffing around booking time slots.
Inventory what you have
- Assets: graphics, displays, product units, laptops/tablets, cable locks, and spares.
- Content: one flagship demo, two customer stories, one printed handout.
- Staffing: 1 presenter per demo station, 1 greeter per aisle, 1 rover per 100 sq ft.
Planning note: teams that cap handouts to one page reduce reprint runs by 30% on average while improving takeaway clarity.
Lock the infrastructure
- Power map: list outlet drops by station; budget 20% overhead for adapters and surge strips.
- Internet: pick wired for demos that must never buffer; Wi‑Fi for check-ins and QR scans.
- AV: determine screen sizes (43–65 inches cover most lines of sight in 10×10 to 20×20).
Need venue-side help? Our team can advise on exhibit planning details including power locations, rigging, and accessibility paths.
13 Trade Show Booth Planning Tips (Step-by-Step)
Follow these 13 steps to plan a booth that attracts, engages, and converts. Start with a tight objective, pick the right footprint, script a 90-second demo, and staff for peaks. Lock logistics—power, internet, shipping, and storage—then rehearse. Finish with a follow-up sequence that triggers within 24 hours.
1) Clarify the single objective
- Pick one win: scheduled demos, on-site trials, or distributor signups.
- Make it countable: 30 meetings, 200 scans, or 10 new reseller leads.
- Write a one-sentence thesis: “We solve X in 90 seconds.”
Teams that set a numeric objective in week one align messaging sooner and avoid late graphic rewrites.
2) Choose the footprint and orientation
- 10×10 (100 sq ft): 1 demo + 1 greeting lane; keep fixtures under 36 inches deep.
- 10×20: 2 demos + storage; add a small hospitality counter.
- 20×20 island: 4 access points; elevate the hero visual to 12–16 feet where allowed.
Inline booths funnel traffic linearly; corners and islands receive multi-directional flows that can increase impressions 1.3–1.6× in busy aisles.
3) Map traffic and line flow
- Entry cone: 6–8 feet of open space where greeters can qualify without blocking.
- Line-of-sight: keep key messages at 4–6 feet height for eye-level read at 10–15 feet.
- Queue lane: serpentine lines increase capacity 30–40% over straight lines in equal space.
We often chalk tape during setup to test routes; ten minutes here prevents all-day congestion.
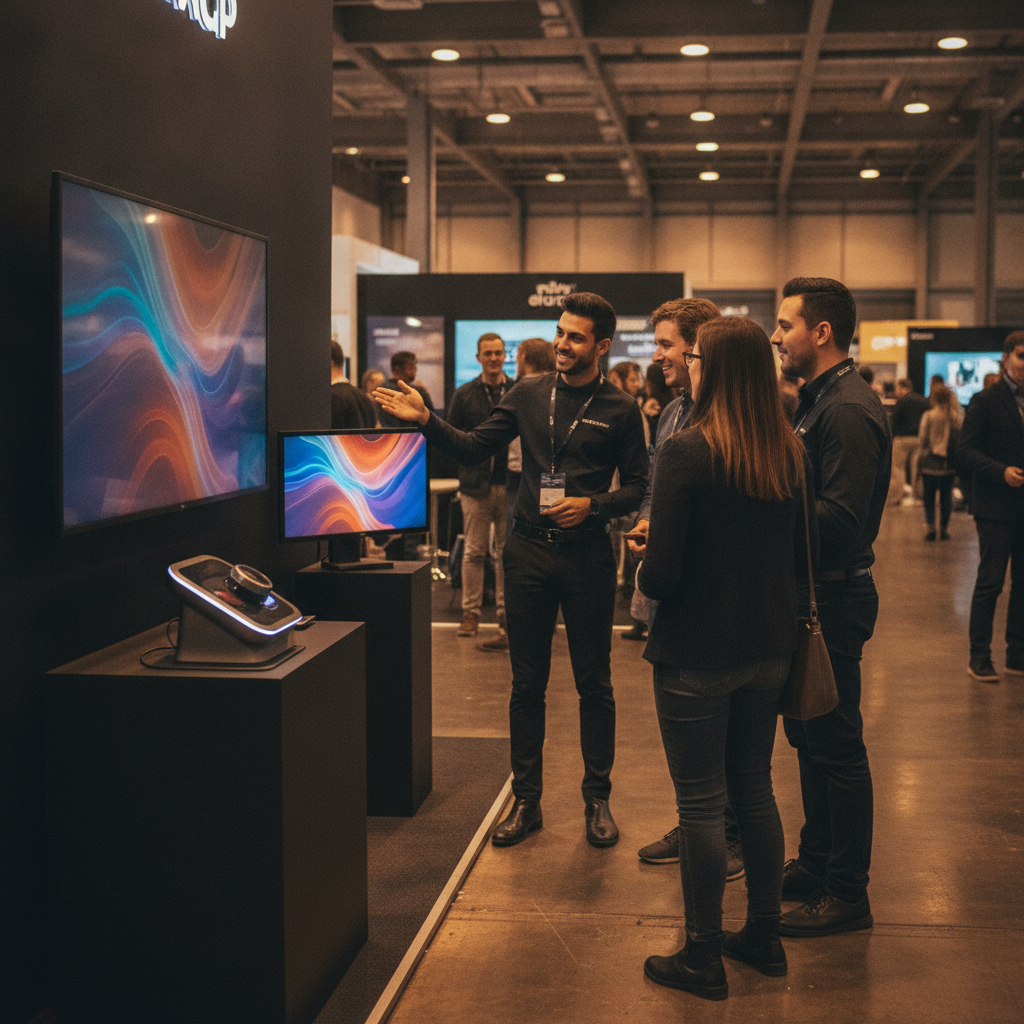
4) Script a 90-second demo
- Structure: problem (15s), reveal (30s), proof (30s), action (15s).
- Props: one physical anchor or animated sequence to make the benefit visible.
- Loop: auto-reset every 2 minutes so walk-ups never see a dead screen.
Short beats long. On crowded floors, average attention windows are under 120 seconds for first contact.
5) Build a three-tier message stack
- Tier 1 (6–8 words): headline they can read at 15 feet.
- Tier 2 (15–25 words): one-liner promise.
- Tier 3: two bullets with proof points (awards, customer logos, quantified outcome).
Limit text density: readers absorb 25–30 characters per second while walking; dense copy gets skipped.
6) Design for accessibility and comfort
- Aisles: keep 36 inches clear; 48 inches where you expect wheelchairs or carts.
- Reach ranges: interactive screens at 34–48 inches height are usable for most visitors.
- Seating: 1–2 stools max; seats slow turnover when space is tight.
Accessibility isn’t optional. Clear paths and comfortable heights raise engagement and reduce staff fatigue.
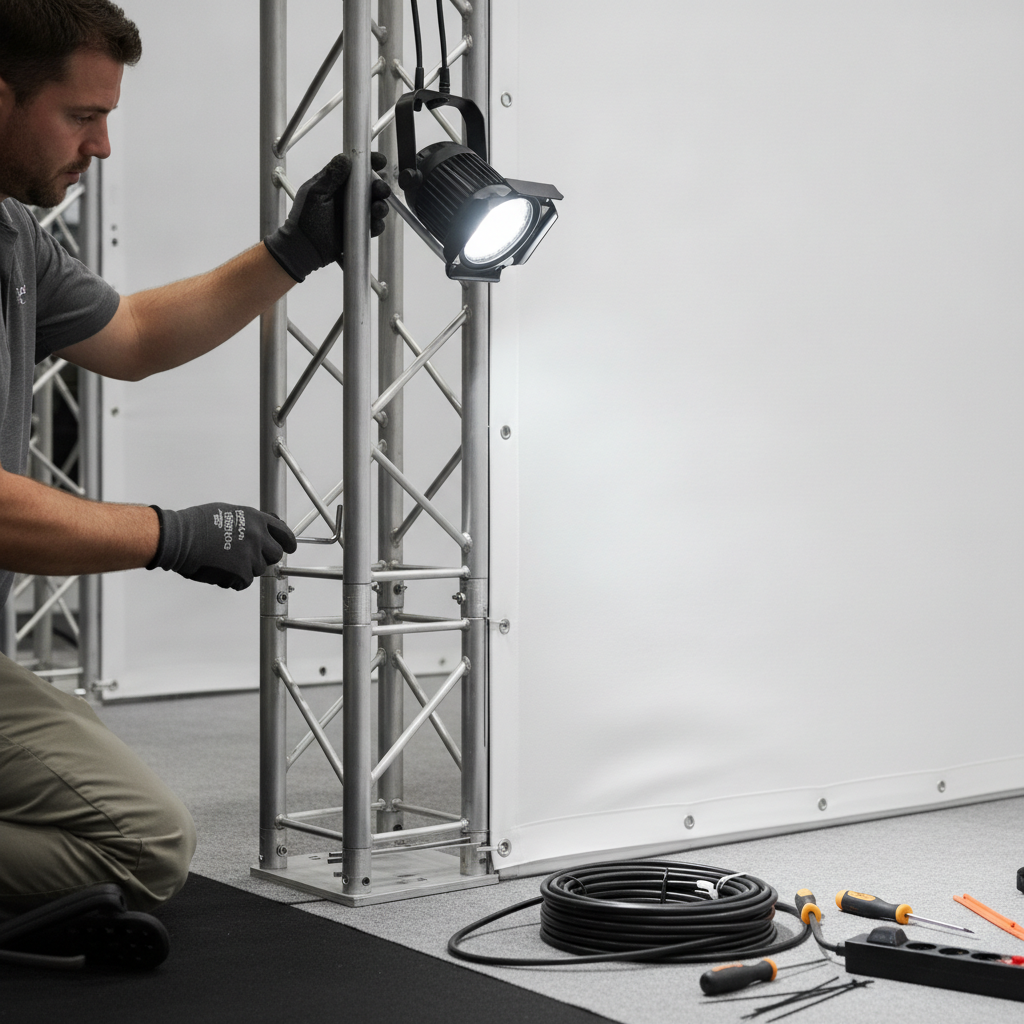
7) Lock power, internet, and AV
- Redundancy: duplicate HDMI and power lines to your primary screen.
- Power drops: one per station; daisy chains create single points of failure.
- Lighting: 300–500 lux at demo surfaces keeps faces bright for photos and video.
Our venue’s integrated systems simplify this; see our trade show and expo support for rigging, staging, and technician coverage.
8) Plan staffing for peaks
- Coverage ratio: 1 staff per 50–75 sq ft during rush hours; half that for off-peak.
- Roles: greeter, qualifier, presenter, and closer. Name them on the run sheet.
- Break grid: 15-minute micro-breaks every 90 minutes maintain energy across multi-day shows.
Teams that assign explicit roles reduce visitor bounce by 15–25% during surges.
9) Engineer your giveaway
- Trigger-based: tie swag to actions (book a demo, complete a challenge) to raise lead quality.
- Size and storage: compact items (under 6 inches) free 8–12 sq ft of counter space.
- Durability: choose items that survive luggage—broken swag equals lost impressions.
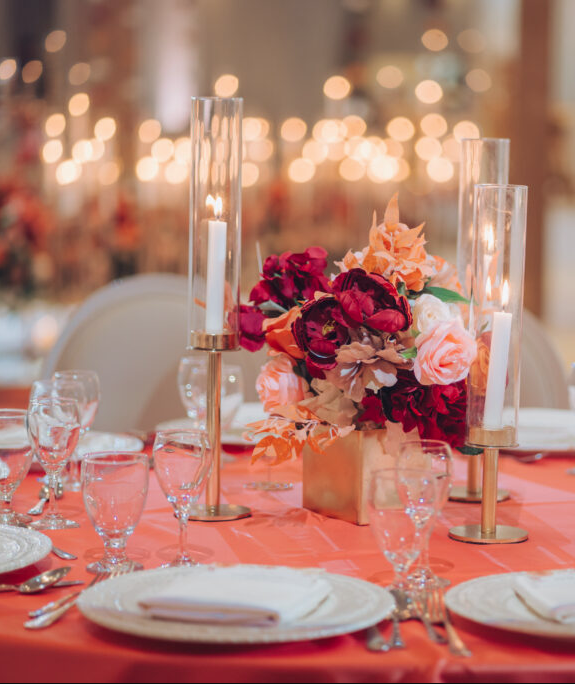
Consider culturally inclusive treats or coffee service; our booth layout tips show how a 24-inch counter can host hospitality without blocking sightlines.
10) Capture leads with intent
- Form length: 5–7 fields max (name, company, email, phone, interest, timeframe, opt‑in).
- Scoring: tag A/B/C on the floor so sales can prioritize within 24 hours.
- Backup: paper cards in a binder—pens and clipboards save days when tablets fail.
Fast follow-up wins. Response within 24 hours increases conversion by double digits in most B2B cycles.
11) Plan shipping, storage, and load-in
- Labeling: booth crates numbered on all sides; include a master manifest in Box 1.
- Staging: set a 10×10 prep zone behind the booth if allowed; it speeds assembly by 20–30%.
- Return path: pre-print waybills; post-show exhaustion causes most labeling errors.
Ask our coordinators about loading door times and on-site storage options to cut setup friction.
12) Rehearse and time the run
- Dry run: full setup in your office 2 weeks out catches 80% of missing items.
- Script: presenters should hit 90 seconds ±10; time with a visible countdown on a phone.
- Contingencies: A/B assets for screen failures and power loss.
Teams that rehearse twice trim live setup by 25–35% and start Day 1 calmer.
13) Close with a 24-hour follow-up
- Sequence: thank-you email, calendar link, and one proof asset (case study or short video).
- Owner: assign one person to push all follow-ups across time zones.
- Reminder: a single SMS or LinkedIn note on Day 3 captures late responders.
Momentum fades quickly after show close; prewriting templates keeps your pipeline moving.
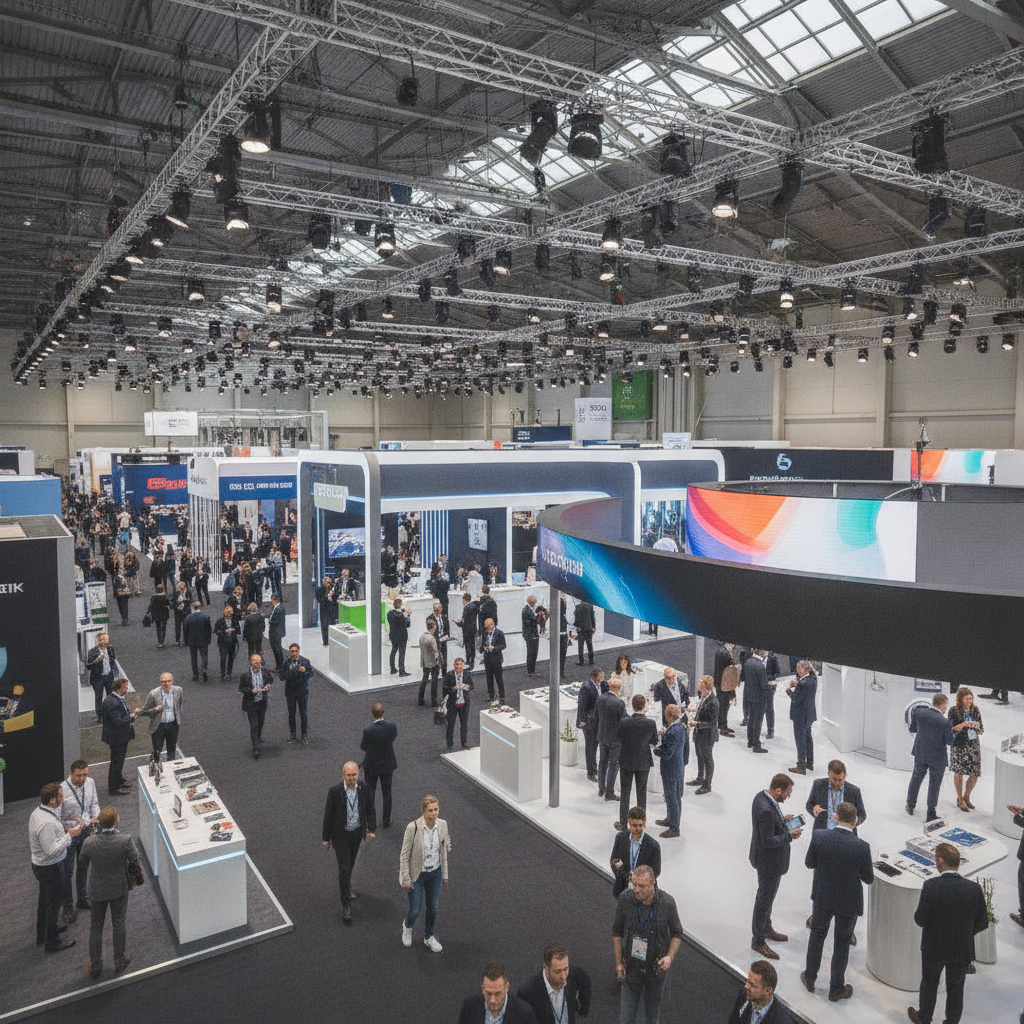
Compare Booth Sizes and Layouts
Select a booth footprint based on your interaction model: quick scans need open inlines; guided demos need corners or pensinsulas; multi-station showcases favor islands. Use the table to match size, ideal uses, and planning notes before you sign the contract or print graphics.
Right-size the space to your story, not the other way around. Here’s a practical comparison to decide fast.
| Format | Typical Size | Best For | Pros | Watch Outs |
|---|---|---|---|---|
| Inline | 10×10, 10×20 | Quick scans, one demo lane | Simple power, easy staff flow | Back-wall glare, single entry choke |
| Corner | 10×10, 10×20 | Two-direction traffic | Extra frontage, flexible queue | Protect open corner from spillover |
| Peninsula | 20×20+ | Guided demos, hospitality | High visibility from 3 sides | More power drops, more staff |
| Island | 20×20, 30×30 | Multi-station showcases | 360° access, hero rigging | Complex cabling, signage height rules |
If you’re weighing islands vs peninsulas for a big launch, walk the hall during a prior show; real traffic patterns beat floor plan guesses.
Buying Guide: Tools, Supplies, and Vendor Checks
Standardize your kit: labeled cases, duplicate cables, surge protection, and a printed manifest. Vet vendors for response times, proof timelines, and on-site support. Confirm material handling rules, rigging, and security. A tight kit plus reliable partners prevents 80% of show-floor emergencies.
Build your field kit
- Power: surge strips, 25–50 ft extensions, gaffer tape (non-residue), and cable covers.
- Tools: multi-bit driver, rubber mallet, zip ties (varied lengths), small level, utility knife.
- Tech: HDMI/USB-C/DisplayPort adapters, spare mouse/keyboard, phone chargers.
- Ops: first-aid pouch, sanitizers, microfiber cloths, trash liners, snacks and water.
Keep the manifest in Case 1 and inside the run sheet binder. Two copies save the day when Wi‑Fi drops.
Vendor due diligence
- Graphics: confirm proof windows (48–72 hours) and color consistency across materials.
- AV: response SLA during open hours; technician contact numbers printed on the run sheet.
- Catering: plan 8–12 light bites per staffer per day; hydration is performance fuel.
At our venue, you can bundle corporate event support with trade show services and diverse in-house menus to streamline your vendor list.
Troubleshooting: Power, Traffic, and Team Hiccups
When power blips, switch to battery demos; when traffic jams, open a secondary greeting lane; when staff energy dips, rotate roles. Most exhibit issues are solvable with a prewritten play: a backup demo, a queue reset, and a hydration and break protocol.
Power and network
- Trip avoided: move surge strips under counters; secure with low-profile covers.
- Downtime cut: one UPS per mission-critical screen keeps a demo alive during short blips.
- Hotspot plan: a phone hotspot bridges short Wi‑Fi drops for scan apps.
Even simple redundancies can save dozens of scans over a day on the floor.
Traffic and line management
- Two-lane tactic: split greeters—one qualifies, one books time slots—so walk-ups don’t stall.
- Signaling: use body language: one step toward the aisle increases stops significantly.
- Overflow: a 6-foot side rail becomes a short-term queue during surges.
We’ve seen lines triple when presenters use names in the first 10 seconds—small cues matter.
Staff performance and morale
- Rotation: presenters shift every 45–60 minutes to keep voices fresh.
- Fuel: light, protein-forward snacks avoid crashes; hydration every hour is non‑negotiable.
- Debrief: 10-minute huddles at open and close surface fixes for the next day.
Consider on-stand hospitality. Our team supports South Asian, Pakistani Halal, Middle Eastern, Sri Lankan, Caribbean, and Continental menus for inclusive options.
Advanced Tips (From Large-Hall Operations)
Upgrade what visitors feel, not just what they see: warm, even lighting; soft flooring; sound-managed demos; and small, thoughtful hospitality. Pre-book micro-events in your booth and invite VIPs; structured moments deliver more conversions than passive traffic alone.
- Acoustics: directional speakers aimed at 45° reduce spill by 20–30% vs open soundbars.
- Comfort: 10–12 mm foam under carpet halves staff fatigue after six hours on duty.
- Micro-events: 10-minute talks on the half-hour convert 2–3× better than ad-hoc demos.
- Hospitality: tea/coffee service during morning rush builds goodwill quickly.
- Photography: plan a golden-hour shoot; high-quality images fuel months of campaigns.
When you need extra space for VIP receptions or content shoots, our conference spaces and elegant halls make it easy to spin up private sessions next door.
Localize Your Plan to Mississauga
At 75 Derry Rd W in the Regional Municipality of Peel, plan for easy highway access, ample free parking (about 700 spots), and diverse catering needs. Allow buffer for cross-town travel and schedule deliveries around rush windows. Localizing these logistics keeps your team on time and your booth running smoothly.
Here’s how to tune your exhibit playbook to our neighborhood and audience realities—without overcomplicating your day.
Local considerations for 75 Derry Rd W
- Leverage the Hurontario St At Derry Rd transit stop for staff arrivals; time call-times 20–30 minutes pre-open.
- Winter setups: pad 15–20 extra minutes for load-in to manage snow mats and cable covers safely.
- Quiet moments: plan brief VIP meetups during midday prayers or off-peak cycles near Mississauga’s Ram Mandir to avoid aisle congestion.
Need to visualize flow? Take a virtual-style walkthrough of our halls and loading patterns with an event coordinator.
Frequently Asked Questions
Exhibitors ask about timelines, staffing, and what to pack. Plan graphics 4–6 weeks out, staff at 1 per 50–75 sq ft during peaks, and bring a labeled field kit with duplicate cables. Rehearse a 90‑second demo and trigger follow-ups within 24 hours to convert momentum.
How early should we lock our booth graphics?
Approve final proofs 3–4 weeks before ship dates and stage a full setup 2 weeks out. That timeline catches color issues, sizing errors, and accessory gaps before you’re on the clock at the venue.
How many people do we need for a 10×20 booth?
Plan for four during rush: one greeter, one qualifier, one presenter, and one closer or scheduler. During off‑peak, two to three can manage, but avoid single-person coverage—it hurts engagement and safety.
What should our lead capture form include?
Keep it to 5–7 fields: name, company, role, email, phone, interest level, and buying timeframe. Tag leads A/B/C on the floor so sales can prioritize follow-ups within 24 hours.
Any food or beverage tips for staff stamina?
Light, protein-forward snacks and steady hydration sustain energy over 6–8 hours on the floor. Coordinate inclusive options—our in-house menus span South Asian, Pakistani Halal, Middle Eastern, Sri Lankan, Caribbean, and Continental cuisines.
Key Takeaways and Next Steps
Pick one measurable objective, design the space to serve it, and rehearse a 90‑second demo. Staff for peaks, script line flow, and prepare a labeled kit. Schedule power, AV, and internet early. Trigger follow-ups within 24 hours to convert show-floor interest into pipeline.
- Start with a one-page plan and run sheet.
- Right-size the booth to your interaction model.
- Pre-book micro-events and VIP moments.
- Standardize a field kit that never leaves the crate.
- Close the loop with fast, sequenced follow-ups.
Planning your next activation? Explore our trade show support and adjacent meeting rooms to expand your presence.
Additional Resources
Use these quick references as you finalize your plan: internal guides for booth layout, trade show services, and corporate event support. They complement your checklist and help you lock logistics early so Day 1 starts on time and stress-free.
- Corporate event planning options: corporate packages overview
- Local show trends and ideas: Mississauga trade show highlights
- Sample social setup inspiration: elegant social layouts
Modular systems speed setup and cut rework. Label each case and number assembly steps to reduce errors under show pressure.
A clear demo zone plus a defined greeting lane prevents cross-traffic and keeps your engagement loop tight.