Trade show booth layout tips are proven practices for arranging space, signage, and activities so more visitors stop, engage, and convert. At a large Mississauga venue serving the GTA, effective booth design improves dwell time, lead quality, and ROI by guiding traffic flow, clarifying offers, and supporting demos with AV, lighting, and staffing.
By Preet Dass — Mississauga Convention Centre
Last updated: April 25, 2026
Quick Summary
Design your booth around one clear objective, then place your hero message at eye level, keep 60–70% of your footprint open, and create a front “landing zone” for greetings. Add an anchor demo, hide storage, use bright but glare-free lighting, and position lead capture within 8–10 feet of the aisle.
This guide shows you how to plan, build, and optimize layouts that draw qualified traffic and turn conversations into meetings. You’ll see sample floor plans for 10×10, 10×20, and 20×20 footprints; staffing ratios; demo and AV placements; and practical on-site adjustments for busy GTA shows.
- Actionable steps from pre-show goals to show-floor flow
- Ten layout patterns you can adapt quickly
- Checklists for AV, catering, and storage that reduce friction
- Mississauga-specific notes on access, timing, and attendee behavior
Introduction
A booth layout is a purposeful floor plan that aligns your message, product demo, and staffing with how attendees move. The best layouts remove friction: no bottlenecks, no blocked sightlines, and clear next steps. Done right, you’ll see more qualified conversations in the same square footage.
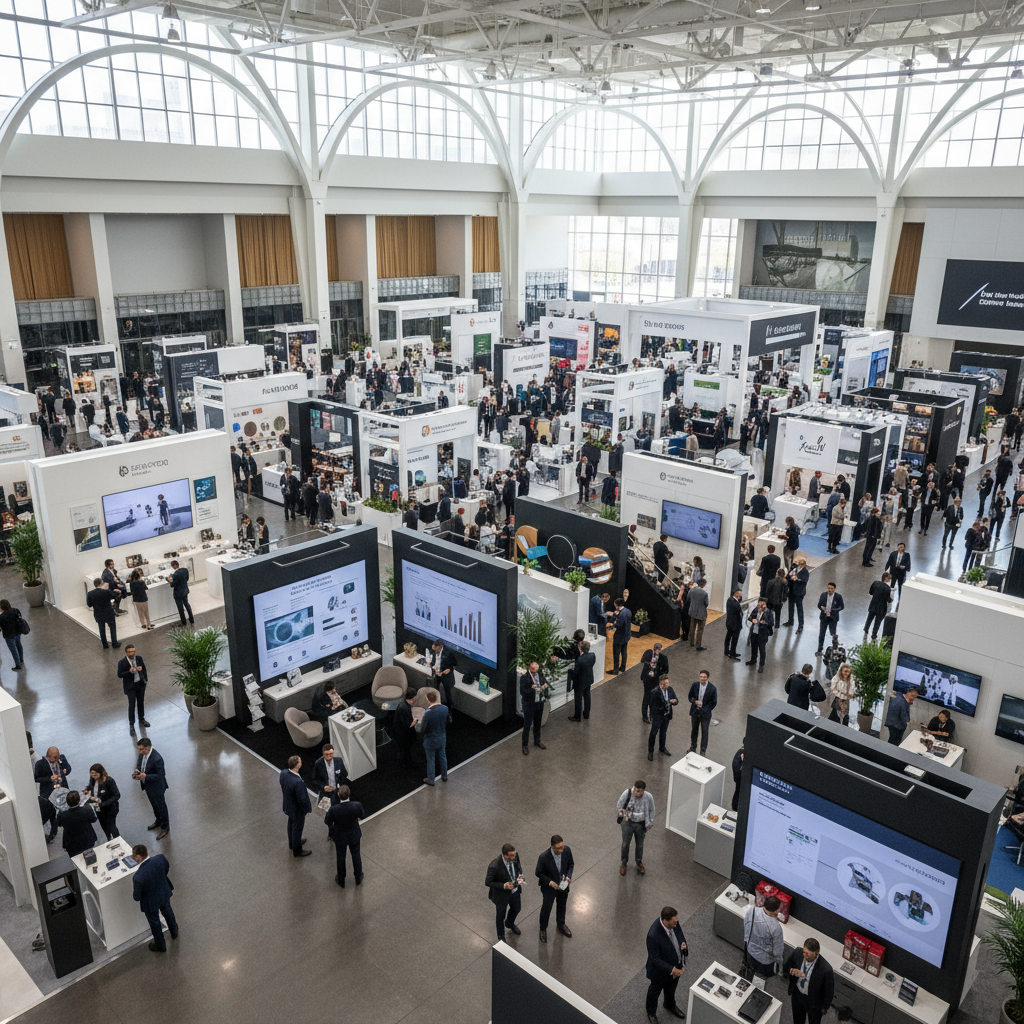
We host trade shows, conferences, and exhibitions across modular halls, so we see thousands of layouts each year. Strong performers share patterns: a visible value prop within three seconds, an obvious place to step in without pressure, and an easy handoff to a quick demo or conversation.
At Mississauga Convention Centre, planners benefit from seven flexible halls (about 4,250 sq ft each), integrated AV, and approximately 700 free on-site parking spots—factors that influence how you stage, staff, and schedule your build. Use these trade show booth layout tips to turn space into steady traffic.
Before You Start (Prerequisites)
Define one business goal, translate it into two attendee actions, and map a path from aisle to action in under 30 seconds. Confirm hall rules, power drops, ceiling height, and access windows. Prep a packing list for flooring, cable runs, storage, and signage so on-site build stays fast and clean.
Clarify the objective
- Choose a single primary outcome: booked demos, qualified leads, or on-site sales.
- Write two micro-actions: scan a QR, watch a 90-second demo, or schedule a meeting.
- Draft one headline (under 10 words) you can read from the aisle.
Know the venue logistics
- Confirm electrical locations, load-in windows, and any rigging limits.
- Note aisle widths and neighbor heights to protect sightlines.
- Leverage on-site AV and staging to simplify setup and reduce vendor coordination.
Our team supports in-hall power planning, projection angles, and mic/speaker placement. See how our trade show and expo services streamline build days with integrated AV, lighting, and technical support—all under one roof.
Prepare must-have components
- Flooring that defines a boundary and reduces fatigue.
- Lead capture device, backup paper forms, and badge scanner plan.
- Hidden storage for bags, giveaways, and cleaning supplies.
- Layered lighting: soft front wash, focused demo spots, and accent backlighting.
Local considerations for Mississauga exhibitors
- Plan staggered staff arrivals to match attendee surges typical of GTA morning sessions; keep a lean team during mid-afternoon lulls.
- Account for seasonal weather; winter coats add clutter—designate a storage nook to keep your front zone clear.
- Use on-site parking strategically for rolling replenishment; restock giveaways during break times to avoid aisle congestion.
Step-by-Step Process: From Goal to Floor Plan
Start by sketching flow from the aisle to your anchor demo, then add a greeting zone, conversation spot, and lead capture station. Mark power and cable paths, confirm sightlines from 15–20 feet, and stress-test with three visitor types: scanners, browsers, and buyers.
Step 1: Map traffic and zones
- Draw an entry arc across the front 30–40% of your footprint as the “landing zone.”
- Place your anchor demo slightly off-center to avoid blocking the entrance.
- Keep 60–70% of the floor open; aim for at least 3–4 feet of internal aisle space.
Step 2: Place your hero message and sightlines
- Position the headline at 4.5–6 feet high so it’s readable over crowds.
- Angle displays 10–15 degrees inward to catch peripheral vision without causing glare.
- Keep the front one-third free of tall fixtures; push height to the back wall or overhead.
Step 3: Stage the demo
- Design a 90-second demo script with one “wow” moment at the 30-second mark.
- Use focused spots (3000–4000K) to light hands and product surfaces without washing screens.
- Route cables under raised flooring or neat raceways; no tripping hazards.
Step 4: Plan conversations and privacy
- Create a side conversation zone with stools angled 15–20 degrees to the aisle.
- Use a low divider or plant wall to reduce noise without fully closing the space.
- For larger footprints, add a back meeting nook with partial frosting or soft drape.
Step 5: Lead capture and next steps
- Place the scanner or tablet 8–10 feet inside the booth, along the natural exit path.
- Standardize fields: role, intent (timeline), and key need; add a quick preset note list.
- Offer a calendar link for on-site meeting scheduling to avoid post-show delays.
Need help translating a sketch into a strong floor plan? Our conference setup ideas article shows common AV and seating patterns that also apply to booths and demo pods.
Layout Examples and Floor Plans
Choose a layout that fits your objective and traffic. Inline 10×10 favors quick scans and a tight demo. A 10×20 adds a meeting nook and storage. A 20×20 island supports two demos, a lounge, and overhead branding—ideal for heavier traffic and multiple offers.
Use these patterns as starting points and adapt to your message and product. Always check rigging rules and power locations before finalizing. Keep the front one-third open, separate browsing from meetings, and place lead capture along the natural exit to reduce backtracking.
| Footprint | Best For | Anchor(s) | Meeting Space | Storage | Notes |
|---|---|---|---|---|---|
| 10×10 inline | Quick demo + lead scans | 1 product pedestal or screen | Standing edge talk | Under counter | Keep 70% open; no tall front fixtures |
| 10×20 inline | Demo + short meetings | 1 main + small side demo | High-top for two | Closet or back wall | Angle entry; add soft divider for privacy |
| 20×20 island | Multiple offers/teams | 2 demos + overhead brand | Lounge for 4–6 | Hidden core | Use diagonal paths; split flows left/right |
For larger exhibits or parallel activations, our capacity guide and parking logistics primer help you size lounge areas, anticipate surges, and plan staff rotations across busy show hours.


Ten adaptable layout patterns
- Single-anchor demo (10×10): one pedestal, back graphic, side tablet.
- Dual-angle demo (10×20): main screen + side product shelf for overflow.
- Runway aisle (10×20): long table demos along a diagonal path.
- Island cross (20×20): central square with four corner micro-demos.
- Lounge-forward (20×20): open sofas up front; demos mid-booth.
- Clinic pods (20×20): 3–4 mini-consult desks along edges.
- Workshop corner (10×20): mini theater with stools and short talks.
- Sampling lane (inline): front tasting bar; staff behind for speed.
- Hardware bench (inline): waist-high bench for hands-on trials.
- Showcase wall (inline): museum-style shelves with guided path.
Best Practices That Consistently Win
Keep the front open, angle visuals inward, and light the product—not the floor. Put your strongest claim at eye level, stage a 90-second demo loop, and locate storage where staff can reach it without crossing the greeting path. Simple beats clutter in every footprint.
- Open frontage: Aim for 70% clear sightline across the front; tall pieces go back.
- Layered lighting: Front wash for faces, spots for hands/products, back accent for depth.
- Sound control: Small speakers facing inward; avoid blasting the aisle.
- Flooring cues: Color or material change to invite entry and define zones.
- Sign hierarchy: Brand above; hero promise mid-height; details near demos.
- Lead capture in flow: Scanner or tablet on the exit path, not the entrance.
- Staff choreography: One greeter per 10 feet of frontage; rotate every 60–90 minutes.
When shows include food or longer dwell times, consider in-booth hospitality. Our culinary team supports South Asian, Pakistani Halal, Middle Eastern, Sri Lankan, Caribbean, and Continental menus; simple bite-sized tastings keep hands free and traffic moving. Explore corporate catering options that pair with your exhibit theme.
Troubleshooting Common Layout Problems
If your aisle is busy but the booth is empty, remove front barriers and move your demo closer to the edge. For crowding, flip the demo inward and create a side lane. If leads feel unqualified, tighten your message and place a clear qualifier question at the greeting point.
- Low engagement: Move the anchor 3–5 feet toward the aisle; brighten lighting by one stop.
- Blocked sightlines: Drop front fixtures below 4 feet; shift height to the back wall or rig.
- Traffic jams: Create a counterclockwise loop; add floor arrows via contrasting texture.
- Poor acoustics: Angle speakers inward; add soft panels or plants to absorb sound.
- Messy look: Add concealed storage; schedule tidy sweeps every hour.
- Lead quality issues: Post a qualifying question (“Which workflow is hardest today?”) at the greeter point.
For show-floor adjustments, coordinate with on-site techs for lighting tweaks and mic levels. Our integrated AV team can re-aim lights or rebalance audio between sessions so your demo stays crisp without overwhelming neighbors.
Advanced Tips (Optional But Impactful)
Use overhead branding only if it improves sightlines from 30–50 feet. Split flows for dual offers, and add a micro-stage for timed talks. Instrument the booth with simple counters and scan funnels so you know which zones convert—and adjust mid-show.
- Overhead elements: Reserve for 20×20+ islands; keep text minimal and legible at distance.
- Timed programming: 5–7 minute micro-talks on the half hour create predictable surges.
- Two-offer strategy: Left lane for product A demo; right lane for consultations.
- Data collection: Track peak times, scan-to-talk ratios, and talk-to-meeting handoffs.
- Lounge calculus: One seat per expected concurrent deep conversation; avoid sofa sprawl.
- Hospitality flow: Place sampling at the front-left; hand-offs to demos happen mid-booth.
Want a sanity check on space, flow, and load-in? Our corporate venue rental overview outlines hall specs, staging options, and service windows planners use to time rigging, carpet, AV, and final dress.
Frequently Asked Questions
Great layouts balance open sightlines with clear action points. Aim for one anchor demo, a greeting zone, and a lead capture station along the exit. Keep tall items at the back and use lighting to guide eyes—these moves solve most booth performance problems fast.
What’s the fastest way to improve a slow booth?
Pull your main demo 3–5 feet toward the aisle, declutter the front third, and brighten product lighting. Add a greeter with a short opener and move lead capture to the natural exit path. These changes usually lift engagement within the hour.
How many staff do I need for a 10×10?
Two people per 10 feet of frontage works well: one greeter, one demo lead. Add a floater during peaks. Rotate every 60–90 minutes to keep energy high and conversations sharp.
Where should I put storage?
Hide storage behind a back wall, in a closet, or under counters. The key is access without crossing the greeting zone. If you offer samples or swag, stage replenishment from the side lane to avoid blocking demos.
Do I need overhead branding for a 20×20 island?
Use it if it improves long-distance visibility and doesn’t clutter the view up close. Keep text short and push details to mid-height graphics. Always check rigging rules and plan lighting angles to avoid glare on screens below.
Additional Resources
Plan beyond the booth: coordinate hall capacity, parking, and catering timing. Use venue-provided AV to speed setup and reduce vendor juggling. Review trade show best practices and venue-specific guidelines before finalizing your layout and run of show.
For exhibit planners comparing GTA venues and services, these reads provide context and planning checklists that complement your layout work:
- Mississauga Convention Centre’s trade show and expo overview for hall specs and on-site tech support.
- Event logistics insights from a regional venue guide: find your perfect venue.
- Catering and hospitality considerations for exhibits: banquet hall with catering guide.
Key Takeaways
Keep the front open, stage a clear anchor demo, and position lead capture on the exit path. Light people and products, not floors and logos. Use data from the first session to adjust placement, staffing, and scripts so every hour performs better than the last.
- One goal, two actions, one anchor demo—keep it simple.
- 70% open sightline across the front; tall elements to the back.
- Lead capture within 8–10 feet of the aisle, along the exit path.
- Timed micro-talks create predictable surges for staff to manage.
- Use integrated AV and on-site support to tweak lighting and sound mid-show.
Conclusion
A strong booth layout makes traffic feel effortless and conversations intentional. Map a path from aisle to action, stage one memorable demo, and support it with clean lighting, smart storage, and ready staff. Iterate daily using scan and meeting data to keep improving.
When you’re ready to turn a sketch into a working plan, we’re set up to help—flexible halls, integrated AV, diverse in-house catering, and experienced floor teams that understand the rhythm of GTA trade shows. Book a discovery session with our team and let’s walk your layout on site.
Soft CTA: Explore our planner’s guide to corporate venue rental and view trade show capabilities to align layout, AV, and hospitality.