Conference room setup is the structured process of aligning room layout, AV, lighting, acoustics, power, and connectivity to a meeting’s goals so everything runs smoothly. At 75 Derry Rd W, the Mississauga Convention Centre team uses this conference room setup guide to help planners deliver reliable in-person and hybrid sessions without stress.
By Mississauga Convention Centre • Last updated: 2026-06-05
Above-Fold: Hook + Table of Contents
Set up a conference room by clarifying objectives, selecting the right layout, sizing displays for back-row legibility, engineering clear audio, securing wired connectivity, tuning lighting and acoustics, and rehearsing a full run-through. Clear roles, labeled cables, and spare adapters prevent delays and keep hybrid attendees fully engaged.
Great meetings aren’t lucky—they’re designed. This practical guide blends enterprise best practices with venue-side experience to help you plan, stage, and run meetings people praise afterward.
- What a professional conference room setup includes
- Why setup choices drive engagement, equity, and decisions
- Step-by-step checklist you can apply today
- Common layouts and when to use each
- Best practices from our on-site AV team
- Tools, templates, and mini case studies
Overview
Conference room setup aligns space, technology, and workflow to your agenda. For teams meeting at 75 Derry Rd W in the Regional Municipality of Peel, this overview highlights the fastest wins—audio first, right-sized visuals, wired-first connectivity, and a documented run-of-show that anyone on your team can follow.
- Audio clarity first: People forgive dim screens; they don’t forgive muffled voices.
- Right-sized displays: Size to the furthest viewer so slides remain legible.
- Wired-first policy: HDMI/USB‑C for presenters; wireless as convenience.
- Documented ops: Roles, rehearsals, and spares reduce risk.
At Mississauga Convention Centre, seven elegant halls (~4,250 sq ft each) and on-site technical support make this process repeatable for groups from 10 to 2,200, with 700 free parking spaces simplifying arrivals.
What Is a Conference Room Setup?
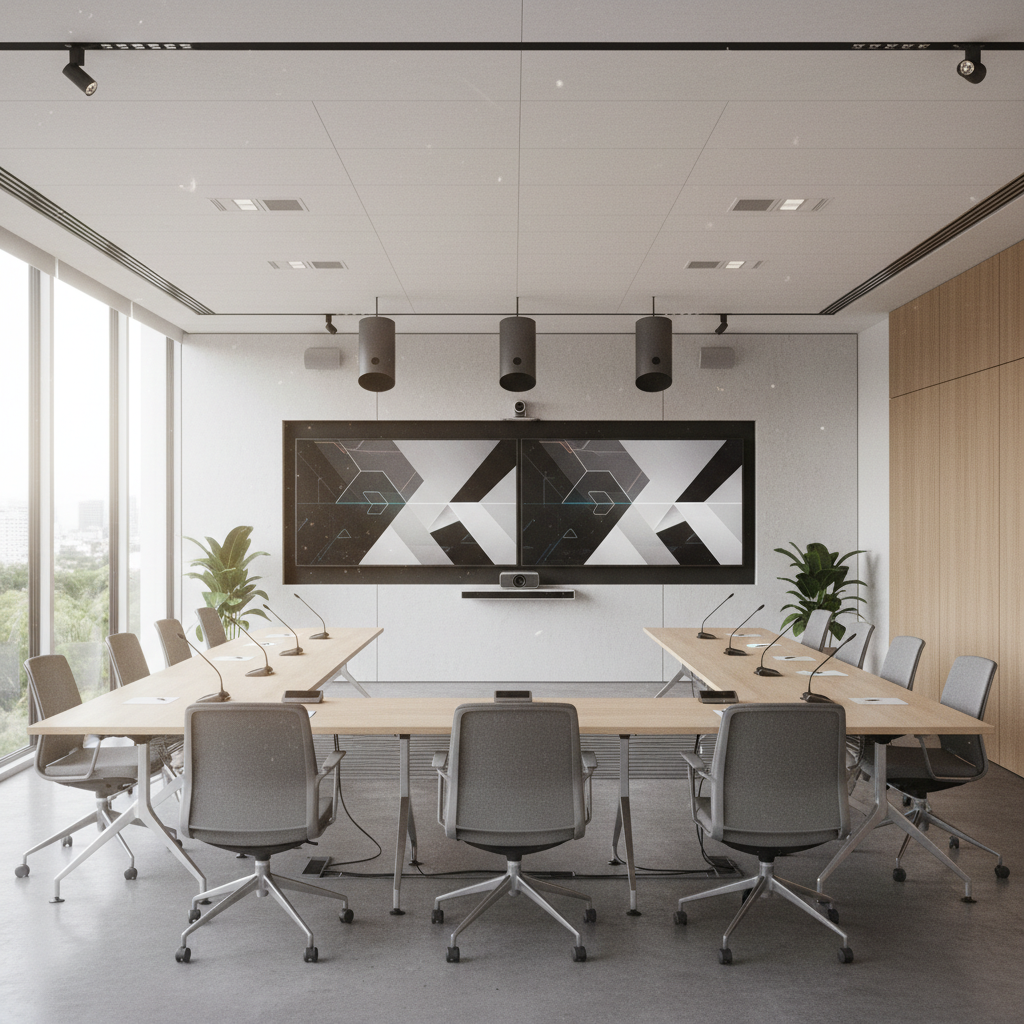
A conference room setup is the end-to-end plan for layout, AV, lighting, acoustics, power, networking, accessibility, and operations that supports your meeting’s purpose. It turns a blank room into a reliable space for presentations, collaboration, and hybrid participation with predictable results.
Think of setup as a system—layout, AV, environment, and operations. Each element must match your agenda, room size, and remote ratio. We’ve found this lens prevents surprises on show day.
- Layout & flow: Entrances, aisles, presenter zones, camera sightlines, and egress.
- Visuals: Display height/width, projector brightness, LED nit levels, and viewing angles.
- Audio: Microphone types, loudspeaker coverage, and digital signal processing (DSP).
- Connectivity: HDMI/USB‑C at table, wired network, and secure wireless as backup.
- Lighting: Presenter key light, audience fill, glare control, and dimmable scenes.
- Acoustics: Reverberation (RT60), background noise, and isolation from adjacent spaces.
- Accessibility: Clear aisles, ramps, assisted listening devices, and signage.
- Operations: Run-of-show, roles, checklists, and labeled storage.
Because Mississauga Convention Centre hosts conferences, seminars, and trade shows daily, we standardize these components across our modern ballrooms and meeting rooms to reduce set time and increase reliability.
Why Good Setup Matters
Good setup reduces tech hiccups, speeds on-time starts, and boosts comprehension. Clear audio, legible visuals, and hybrid parity improve participation and decision quality. The result is fewer “can you hear me?” moments and more time on outcomes.
- Engagement: Speech intelligibility is the #1 factor in perceived quality—clarity beats resolution.
- Equity: Hybrid parity (equal voice for remote and in-room) increases participation and follow-through.
- Reliability: Redundant inputs and spares dramatically reduce delays.
- Comfort: Ergonomics, airflow, and lighting scenes decrease fatigue in long sessions.
When working with GTA clients, we repeatedly see simple changes—proper mic placement, brighter screens, and a Q&A moderator—lift satisfaction scores in post-event surveys. With seven similarly sized halls, we can mirror successful setups across concurrent sessions for consistent results.
Conference Room Setup Guide: Step-by-Step
Start with objectives and headcount, pick a layout that fits the collaboration style, right-size displays and audio coverage, confirm power and network paths, then rehearse with real content. Lock roles, print checklists, and stage spares before doors open for a smooth start.
- Clarify objectives: Decision, training, pitch, town hall? Define outcomes first and map agenda timing.
- Lock headcount + remote ratio: Drives camera choice, mic coverage, and display sizing.
- Choose layout: Boardroom, U-shape, classroom, theater, cabaret, or clusters to fit interaction.
- Design visuals: Use the furthest-viewer/6 image-height rule for slide legibility.
- Engineer audio: Map zones, choose mic types, and plan loudspeaker coverage with DSP.
- Provision connectivity: Prefer wired HDMI/USB‑C; pre-stage adapters; confirm network QoS.
- Tune lighting: Add key light for faces, manage glare, and pre-program scenes.
- Treat acoustics: Target speech-friendly RT60; reduce HVAC and hallway noise.
- Accessibility & safety: Clear aisles, ramps, and assisted listening as needed.
- Rehearse + document: Full run-through with content, presenters, and remote links.
Need a turnkey checklist? Our in-house team shares a detailed event AV checklist that covers inputs, backups, and labeling practices we use daily across our meeting rooms.
Types of Rooms and Layouts
Match layout to the job: boardroom for decisions, U-shape for facilitated discussion, classroom for note-taking, theater for keynotes, cabaret for workshops, and clusters for collaboration. Each layout shifts camera angles, mic choices, and display height.
Common layouts and best uses
- Boardroom (8–20): Single front PTZ camera, beamforming table array, dual front displays.
- U-shape (15–30): Dual displays, boundary mics along the table edge, side camera for facilitator.
- Classroom (20–120): Rows with center aisle, lectern mic + catchbox for Q&A, document camera for demos.
- Theater (50–300): Presenter focus; lavalier or handheld mics; distributed ceiling speakers.
- Cabaret (40–180): Half-rounds for group work; roaming mics; multiple camera views.
- Collaborative clusters (12–60): Huddle pods with shared screens and local mics per pod.
| Layout | When to Use | Camera Plan | Audio Plan |
|---|---|---|---|
| Boardroom | Executive decisions | Front PTZ + auto-framing | Table array + DSP |
| U-shape | Workshops, feedback | Front + side angles | Boundary mics |
| Classroom | Training, exams | Front wide + doc cam | Lectern mic + catchbox |
| Theater | Keynotes, panels | Front PTZ + stage cam | Lavalier/handheld + ceiling |
| Cabaret | Interactive sessions | Multiple table views | Roaming mics |
Not sure which format fits? Our conference room AV systems guide explains how camera placement, mic strategy, and display sizing shift with each layout, so you can choose confidently.
Best Practices That Cut Risk
Design for audio first, then visuals. Favor wired connections, label everything, and keep a full set of spares. Script your run-of-show and rehearse with real content. Document settings so you can restore the room in minutes at 75 Derry Rd W.
Audio and speech intelligibility
- Prioritize mic placement: Keep 12–18 inches from mouths for lectern/handheld; use beamforming arrays for larger tables.
- Reduce reverberation: Soft furnishings and wall treatments help you reach speech-friendly RT60.
- DSP presets: Store profiles for panel, keynote, training, and hybrid call scenes.
Visuals and content legibility
- Right-size displays: Furthest viewer/6 ≈ image height for detailed content like spreadsheets.
- Brightness matters: Projector lumens and LED nit levels must overcome ambient light without glare.
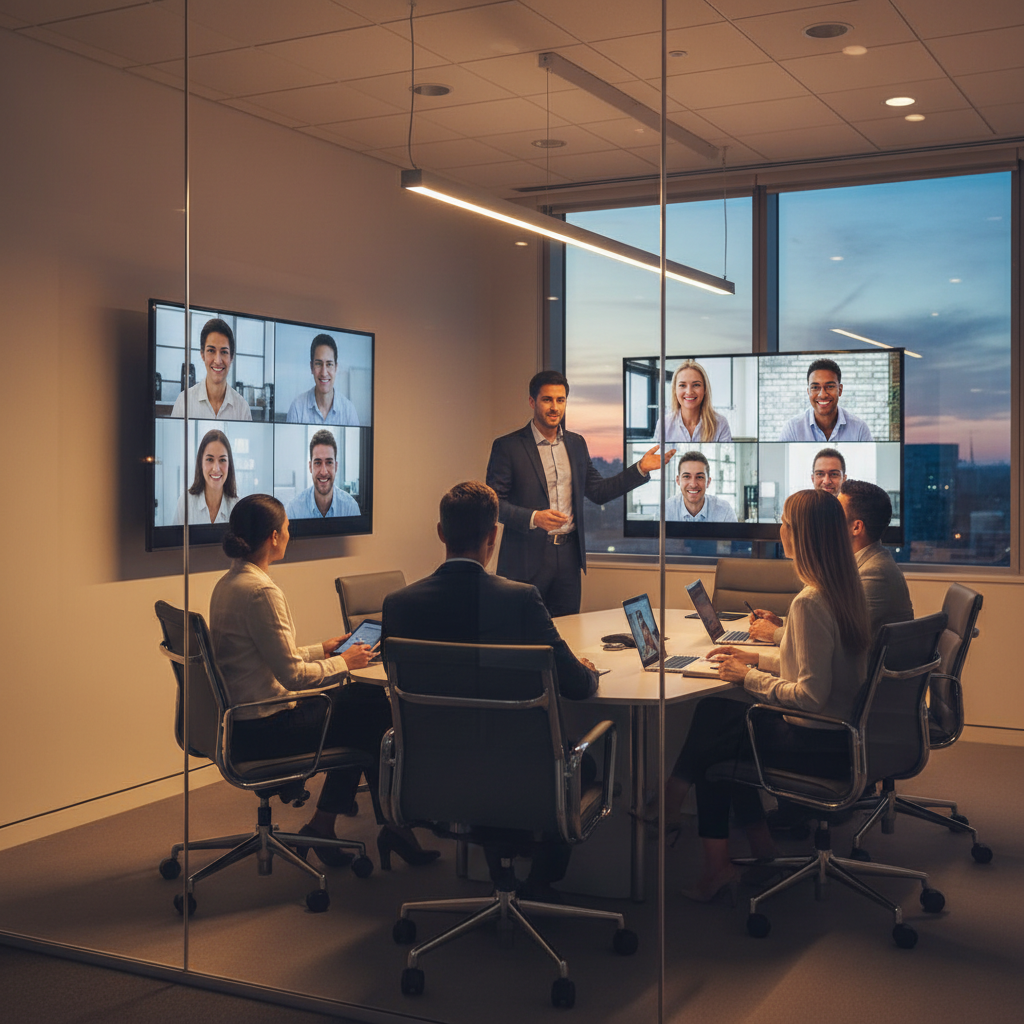
- Dual screens for hybrid: Slides on one, gallery/notes on the other to improve parity.
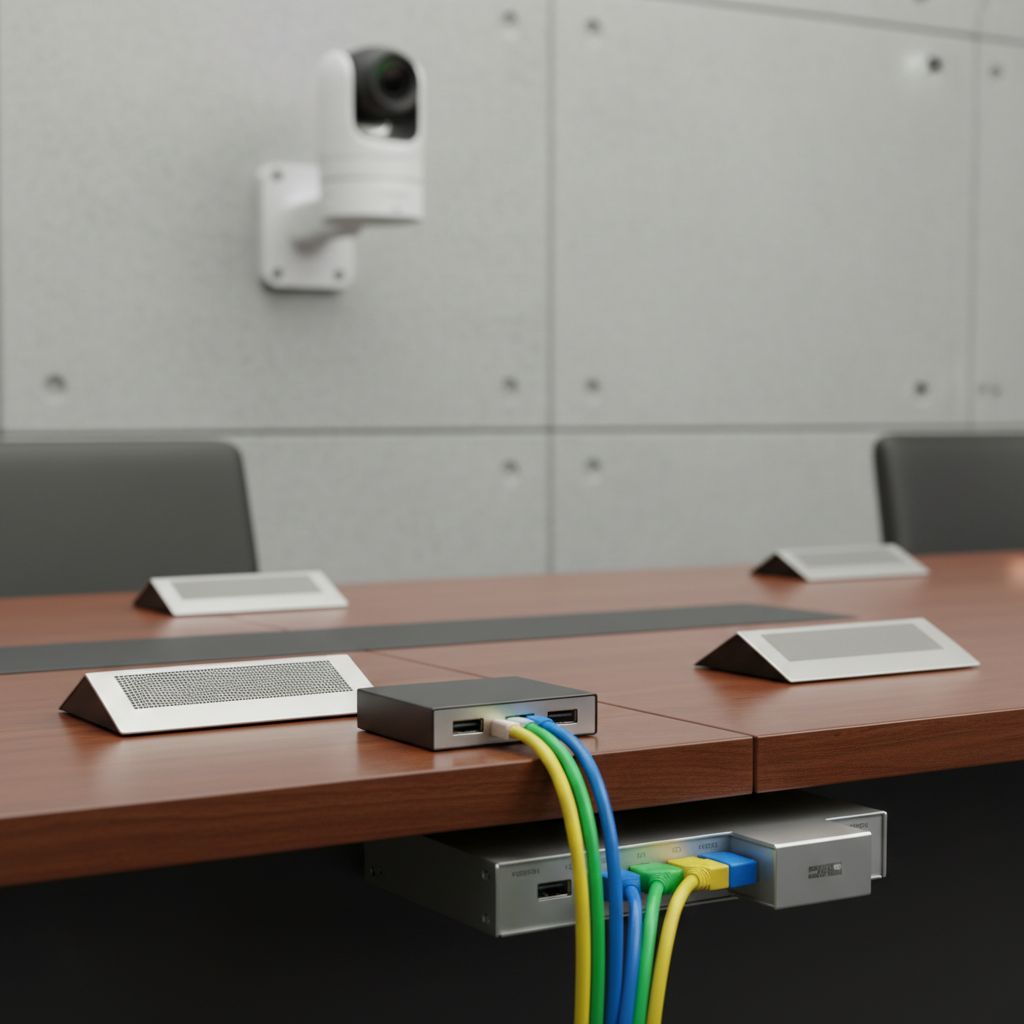
Connectivity and power
- Prefer wired: HDMI/USB‑C at the table with a stable network uplink and QoS for conferencing apps.
- Redundancy: Spare adapters, extra cables, and a backup input path for presenters.
- Cable management: Under-table switchers and floor covers keep aisles safe and tidy.
Lighting and camera parity
- Key light faces: 45-degree soft light on presenters; avoid ceiling can-only rigs that shadow eyes.
- Kill glare: Shade windows, choose matte finishes near displays, use camera filters if needed.
- Auto-framing cameras: Eye-level shots help remote participants read body language.
For a deeper checklist, see our staging and production tips used across corporate meetings, seminars, and galas at the Centre.
Tools, Templates, and Resources
Use a display-size calculator, an audio coverage plan, and a pre-event checklist. Standardized templates keep teams aligned and reduce rework. Keep QR links to digital runbooks handy for quick resets and role hand-offs between sessions.
- Room calculator: Determine display height from furthest viewer distance; confirm viewing angles.
- Audio planner: Map mic zones and ceiling speaker coverage; pre-set DSP scenes.
- Hybrid template: Camera placements, slide-to-gallery mapping, chat moderation, and Q&A flow.
- Run-of-show: Minute-by-minute cues, transitions, and on-stage hand-offs.
- Reset checklist: Power cycle order, input defaults, labeled storage for adapters.
For kickoff discipline and smooth starts, review project kick‑off basics—the same principles apply to meeting production teams and presenters.
Case Studies and Real-World Examples
Small tweaks deliver big gains. Swapping mic types, resizing displays, and adding lighting scenes can lift satisfaction scores dramatically. These GTA examples show practical choices that improved clarity, equity, and on-time starts for recurring meetings.
Executive board review (20 leaders)
- Challenge: Remote directors reported poor speech clarity during discussions.
- Setup: Beamforming table array, front PTZ camera at eye level, dual 98-inch displays.
- Outcome: Marked improvement in remote sentiment after audio upgrade and camera eye-line adjustment.
Quarterly town hall (220 attendees + remote)
- Challenge: Slides unreadable from the back; Q&A stalled without a moderator.
- Setup: Brighter projection, larger screens, roaming mics, and a designated Q&A moderator.
- Outcome: Faster Q&A cadence and strong slide legibility across the room.
Product training (80 participants)
- Challenge: Hands-on demos needed multi-angle camera views and document camera close-ups.
- Setup: Doc cam on side screen, ceiling speakers for even coverage, catchbox for questions.
- Outcome: Higher retention reported in post-session feedback and fewer repeated questions.
Our seminar room acoustics guide explains why even distribution and lower reverberation times stabilize speech clarity for hybrid events.
Frequently Asked Questions
Great setups balance layout, AV, and operations. The answers below cover popular questions about screen sizing, mic choices, hybrid workflows, and rehearsal timing so you can deliver reliable meetings without stress.
How big should my display be for detailed slides?
A quick heuristic is the furthest viewer distance divided by six equals the image height. If your back row is 60 feet away, target ~10 feet of image height. Standards-based calculators refine this using font size and critical task detail.
What microphone types work best for hybrid rooms?
For board tables, beamforming arrays or boundary mics deliver consistent pickup without passing handhelds. For keynotes, use a quality lavalier or handheld. Pair with DSP echo control and gentle noise reduction for intelligibility.
How early should I rehearse the full run?
Run a content-ready rehearsal 24–48 hours before doors open, then arrive early on event day for a final pass. Test mics, cameras, content switchovers, and any remote links so you can fix issues before guests arrive.
Are wired connections still necessary in 2026?
Yes—keep HDMI/USB‑C as your primary presenter path. Wireless casting is convenient, but a wired-first approach avoids latency, dropouts, and version conflicts when time is tight and executives are waiting.
Quick Summary
Start with objectives, pick the right layout, size displays from the furthest viewer, tune mics and speakers for intelligibility, and rehearse with real content. Wired first, wireless as convenience. Document everything so you can reset in minutes between sessions.
- Audio first; visuals second; operations always.
- Use standardized calculators, templates, and checklists.
- Design for hybrid parity with dual screens and auto-framing.
- Label, document, and keep spares staged.
Local considerations for 75 Derry Rd W
- Plan arrival flow near Hurontario St At Derry Rd during peak commute; open doors early to stagger check-in.
- Winter months bring early dusk; pre-program lighting scenes for safe, well-lit load-ins and guest arrivals.
- For cultural visits, Mississauga’s Ram Mandir is nearby—time breaks carefully so sessions resume on schedule.
Conclusion and Next Steps
A dependable conference room setup blends the right layout, intelligible audio, legible visuals, and documented operations. When teams follow a checklist and rehearse, meetings start on time and stay focused—whether 12 executives or 200 attendees join on-site and remote.
- Key Takeaways
- Define objectives and right-size the room—layout follows purpose.
- Audio clarity beats everything else; tune mics and DSP first.
- Use wired-first connectivity with staged adapters and a backup path.
- Pre-program lighting, test hybrid flows, and run a dress rehearsal.
- Action steps
- Download our event AV checklist and assign roles.
- Review AV system best practices for your chosen layout.
- Share the acoustics guide with presenters and moderators.
Prefer a walkthrough or virtual preview? Our team can recommend layouts, staging, and menus for conferences, seminars, and trade shows—and coordinate AV, lighting, and décor in-house. Book a discovery session at our Mississauga venue and see why planners trust us for seamless meetings.
Planning a meeting in the GTA? Explore our venue overview to see seven flexible halls, modern AV, diverse in-house catering, and 700 free parking spots minutes from the airport and major highways.
Presenter presence matters as much as gear. For on-camera polish, lighting and framing tips from established practitioners help presenters feel confident; see practical advice on looking your best on virtual calls. For exhibition planning flows that influence conference room adjacencies, these booth layout tips inform wayfinding and aisle spacing.