

 28 September, 2026
 A trade show floorplan is ready when it works as an operating plan, not merely when every booth has a number. It should help attendees move confidently, give exhibitors the space and services they need, and allow venue teams to manage access, technology, setup, and dismantling.
Use the seven decisions below to review an exhibitor floor plan before you publish it. The framework is useful for trade show organizers, corporate planners, marketing teams, and exhibitors preparing an event in Mississauga or across the GTA.
1. Define the show goals, audience, and capacity before drawing booths

Begin with the event brief, not the booth grid. A buyer-focused exhibition, a product demonstration show, and a recruitment event may use the same room differently because their visitors have different reasons for attending and different movement patterns.
Write down the decisions the floorplan must support:
- What should attendees do first after registration?
- Which exhibitors, demonstrations, stages, or networking areas need the most visibility?
- How many exhibitors require standard booths, larger footprints, meeting rooms, or demonstration space?
- When will visitor volume peak, and where are queues likely to form?
- What must remain accessible for staff, vendors, equipment, and emergency response?
Do not confuse the venue’s total capacity with usable exhibition area. Registration, food service, stages, lounges, storage, and circulation all reduce the space available for booths. Confirm the event brief with the organizer, venue representative, and operations lead before promising booth inventory.
2. Choose the hall and divide the floor into useful zones
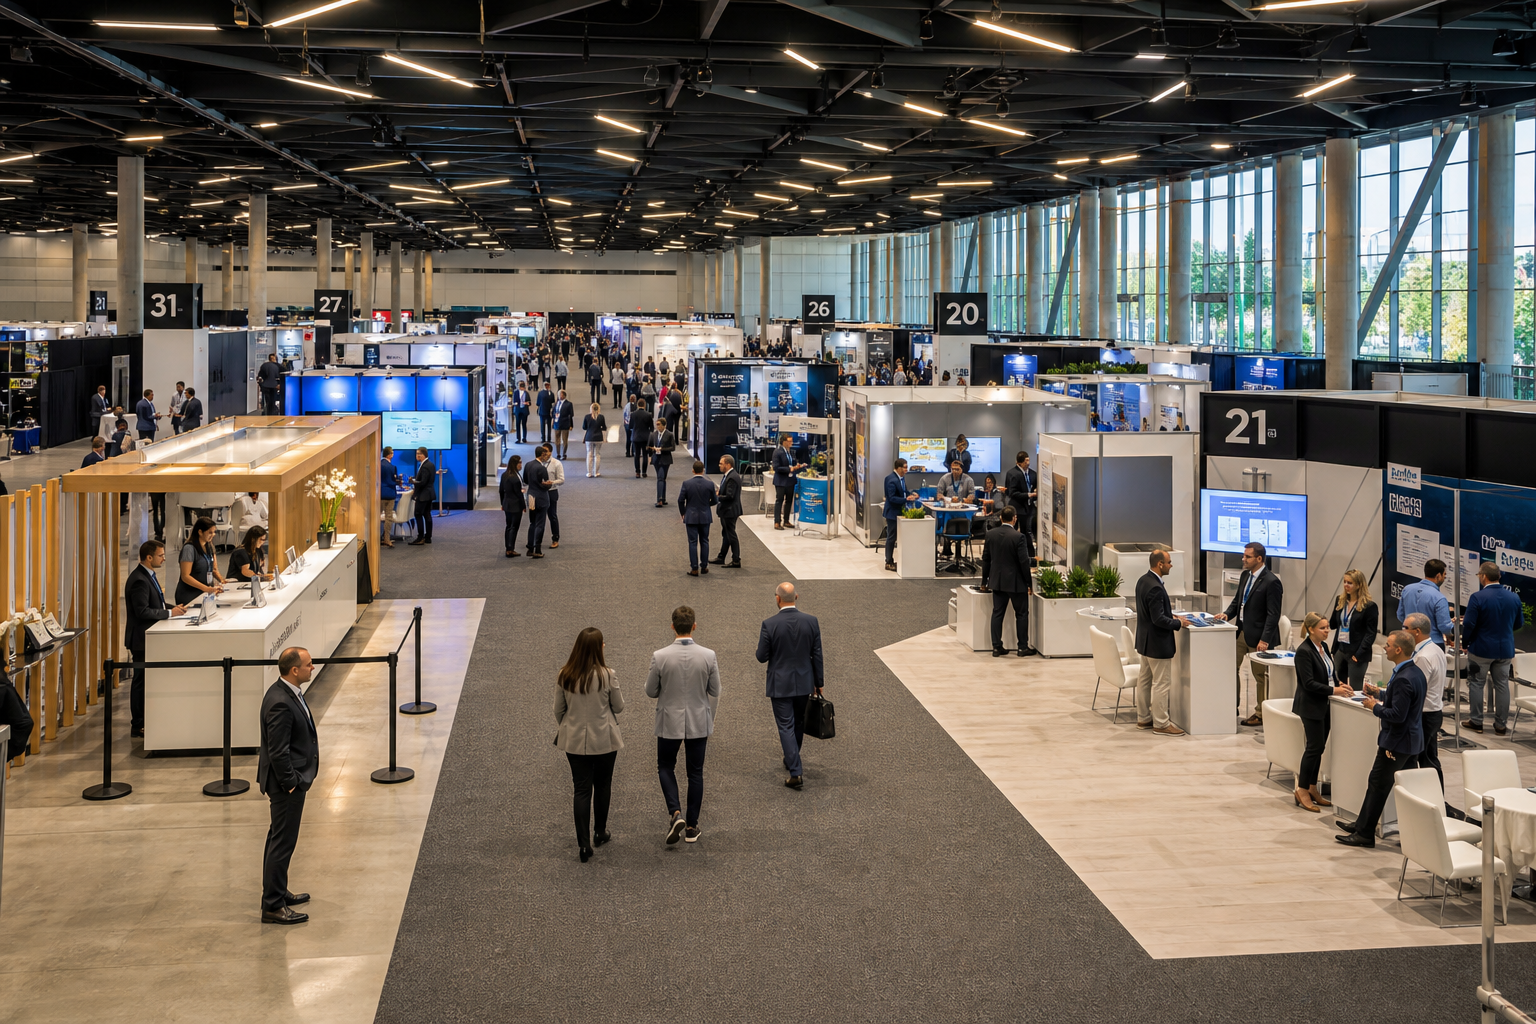
Once the requirements are clear, select the hall and create zones before assigning exhibitors. A useful first draft can show registration, the main entrance, exhibit areas, demonstrations, food or refreshment areas, networking space, storage, staff areas, and service access.
Mississauga Convention Centre offers seven flexible halls of approximately 4,250 square feet each, as well as trade show and exhibition capability. That modular context can help planners discuss whether one hall, a combined configuration, or a separate zone arrangement is appropriate, but the correct choice still depends on the event brief and final venue confirmation.
Think about the relationship between zones rather than treating them as isolated boxes. Registration should not immediately block the first row of booths. A demonstration area needs enough surrounding space for people to stop without obstructing the main route. Food service can encourage dwell time, but it may also create queues and noise near conversation-heavy exhibits.
Ask the venue team to confirm the practical boundaries of each proposed zone, including entrances, doors, service routes, fixed features, and any restrictions that do not appear on a marketing plan.
3. Place booths to balance visibility, traffic, and conversation space
High-traffic locations are attractive because they offer visibility, but they are not automatically the best fit for every exhibitor. A booth beside registration may receive repeated exposure while also competing with queues and arrival confusion. A central demonstration may draw attention while creating a crowd that blocks nearby exhibitors.
Compare each location using four questions:
- Can attendees see the booth or its primary message as they approach?
- Can visitors step into the space without stopping the main flow?
- Can staff hold a conversation, conduct a demonstration, or capture a lead without spilling into the aisle?
- Does the location suit the exhibitor’s purpose, audience, equipment, and staffing level?
Use perimeter booths for exhibitors that benefit from a quieter conversation area, storage access, or a larger display footprint when the venue permits it. Use central or prominent positions for features that genuinely need visibility, but place them so their queues and audience do not create a bottleneck.
For a more detailed review of entrances, displays, demonstrations, signage, lead capture, and staffing, use these trade show booth layout tips after the overall floorplan has been drafted.
Document the reason for unusual placements. This makes exhibitor conversations easier and gives the operations team a clear basis for reviewing later changes.
4. Confirm aisles, accessibility, and emergency access
A floorplan should be tested under busy conditions, not only viewed as a neat diagram. Imagine visitors arriving at once, a demonstration attracting a crowd, exhibitors unloading materials, and staff moving equipment between zones.
Check that routes remain usable around registration, entrances, food service, stages, demonstrations, and high-interest booths. Review doorways and turning areas, and make sure equipment, signage, furniture, packaging, and queues cannot gradually narrow the intended path.
Accessibility should be part of the first layout review. Consider whether guests using mobility devices can reach registration, exhibits, seating, washrooms, food areas, and exits without avoidable detours. Also consider sightlines and reachability at counters or displays rather than focusing only on the aisle itself.
Keep emergency and service routes identified and unobstructed. Do not invent exact aisle widths or assume that a generic diagram is venue approval. Ask the venue and relevant safety professionals to confirm the final plan against the building’s requirements, event setup, and local rules.
5. Build signage and wayfinding into the layout
Attendees should be able to answer three questions quickly: Where do I go first, where is the area I need, and how do I find a specific exhibitor or feature? If the floorplan leaves signage until the end, the physical layout may already make clear wayfinding difficult.
Mark the planned positions for registration signs, zone identifiers, exhibitor numbers, sponsor branding, demonstration signs, food areas, washrooms, exits, and any stage or meeting areas. Check what visitors can see from the entrance before they enter the main show floor.
Use a consistent numbering system and match the published exhibitor list to the floorplan. Avoid placing a sign behind a tall display, beside a dense cluster of structures, or where visitors must stop in the main route to read it. If a sponsor or feature needs a large sign, test its effect on sightlines and circulation before approving it.
Give exhibitors a clear signage brief with their assigned number, location, permitted display information, delivery deadline, and any technical or height restrictions confirmed by the venue.
6. Map power, internet, AV, lighting, and technical needs
Utilities are floorplan information, not just last-minute service requests. Each booth or activity area should have a recorded requirement for power, internet, screens, microphones, projection, lighting, sound, or other technical support. The plan should identify what is confirmed, what is requested, and what still requires venue approval.
Review cable paths and equipment positions alongside attendee movement. A power drop that works on paper may create a trip risk or interfere with an accessible route if the installation path is not considered. Demonstrations need enough room for equipment, operators, and viewers. Screens and speakers need suitable orientation so they support the experience without distracting or obstructing nearby booths.
Mississauga Convention Centre lists in-house AV systems, lighting, staging, and technical support among its event services. That can reduce the need to coordinate separate technical teams, but planners should still confirm the specific equipment, capacities, placement, costs, scheduling, and technical responsibilities for the event.
Keep one technical schedule connected to the floorplan. It should identify booth or zone, requested service, location, installation timing, responsible contact, and approval status.
7. Connect every booth to logistics and secure final approval
The approved map must connect each exhibit location with the work required to put it there and remove it afterward. That includes shipping, move-in, installation, electrical service, internet or AV orders, storage, labor responsibilities, and dismantling.
Once the layout is stable, use a trade show booth logistics checklist to connect each exhibit location with shipping, move-in, installation, service orders, and outbound returns. Do not assume that a booth can receive freight, store packaging, or access a service route simply because the symbol fits on the drawing.
The venue’s location at 75 Derry Road West, near major highways and Toronto Pearson International Airport, may be relevant when planning attendee arrival and supplier access. Approximately 700 on-site parking spaces may also be useful to consider when reviewing arrival patterns, but parking capacity does not replace a written arrival, loading, and move-in plan.
| Floorplan element | Question it must answer | Primary confirmation owner |
|---|---|---|
| Booth location | Does the footprint match the exhibitor’s display and activity? | Organizer and exhibitor |
| Aisles and routes | Can attendees, staff, equipment, and accessible users move safely? | Organizer and venue |
| Signage | Can visitors identify zones, booths, facilities, and exits? | Organizer and marketing lead |
| Power and AV | What is needed, where is it located, and who supplies it? | Exhibitor and technical lead |
| Freight and storage | How will materials arrive, be installed, stored, and removed? | Operations lead and venue |
| Final changes | Who can approve a revision after publication? | Named event decision-maker |
Final trade show floorplan approval checklist
Before publishing the layout or sending it to exhibitors, confirm each item below:
- Event objectives, audience, expected attendance, and peak periods are documented.
- Booth inventory, dimensions, special displays, demonstrations, and meeting requirements are accurate.
- Hall selection, entrances, registration, exhibit zones, food areas, stages, storage, and staff areas are identified.
- Booth locations support visibility without creating queues or conversation bottlenecks.
- Aisles, doorways, accessible routes, emergency paths, and service access remain clear.
- Exhibitor numbers, zone signs, directional signs, facilities, exits, and sponsor placements are planned.
- Power, internet, AV, lighting, staging, screens, microphones, and cable paths are recorded with approval status.
- Freight, move-in, installation, storage, labor, dismantling, and outbound responsibilities are assigned.
- Arrival, parking, supplier access, and attendee entry instructions match the venue plan.
- A named organizer, venue contact, technical lead, and operations lead have reviewed the final version.
- The revision date and change-approval process are shown on the published document.
Frequently asked questions
When should a trade show floorplan be finalized?
Finalize it after booth inventory, special requirements, utilities, signage, access routes, and logistics responsibilities have been reviewed, but early enough for exhibitors to plan graphics, shipping, staffing, and setup. If late changes are unavoidable, use a controlled revision process rather than circulating several unofficial versions.
What information should organizers send exhibitors with the floorplan?
Send the booth number and footprint, orientation, neighboring features where relevant, confirmed services, signage instructions, move-in and dismantling information, delivery responsibilities, key contacts, and the revision date. Exhibitors should not have to infer whether a symbol represents power, storage, a queue, or a shared service area.
Should utilities and logistics appear on the trade show floorplan?
Yes, at least at the level needed to coordinate decisions. The main attendee-facing map can remain readable, while a technical or operations layer records power, internet, AV, lighting, freight, storage, installation, and dismantling details. The important point is that these details stay connected to each booth location and are approved by the responsible team.
Conclusion: approve the floorplan as an operating plan, not just a map
The strongest trade show floorplan connects seven decisions: the event goal, hall and zones, booth placement, movement and access, wayfinding, technical services, and logistics. Review it from the perspective of an attendee, an exhibitor, a technician, a supplier, and the venue operations team.
When the layout answers who goes where, what each booth needs, how visitors move, and how the show is built and dismantled, it becomes a practical approval document rather than a static diagram. For planners evaluating flexible halls, trade show capability, technical support, and arrival logistics in Mississauga, Mississauga Convention Centre can provide venue information for the next planning discussion.