

 28 September, 2026
 The best breakout room layout depends on what attendees must do in the room. Presentation-heavy sessions need clear forward-facing sightlines, while workshops need table access, facilitator movement, and space for collaboration. Hybrid sessions add another requirement: remote participants must be able to see, hear, and contribute.
Choose the session format first, then validate the layout against attendance, furniture, accessibility, AV, and movement. The comparison below provides a practical starting point before you brief a venue or production team.
Key Takeaways
- Understanding the purpose of your meeting is crucial for selecting the right breakout room layout.
- Different layouts cater to different needs: from presentations to collaborative workshops.
- Always consider AV requirements and accessibility when planning your breakout sessions.
- Testing sightlines and movement paths can prevent issues on the day of the event.
- Mississauga Convention Centre offers diverse options for event planners, ensuring a seamless experience.
Step 1: Start With the Session Goal
Do not begin with the furniture diagram. Begin by naming the dominant activity. Ask whether attendees will mainly listen, take instruction, discuss a decision, create something together, or participate from both inside and outside the room.
- Listening and viewing: start with theater seating.
- Instruction and note-taking: start with classroom seating.
- Executive discussion: consider boardroom or hollow square.
- Facilitated interaction: consider a U-shape or pods.
- Hybrid participation: select the layout that supports camera framing and natural in-room interaction.
This prevents a common mistake: choosing the layout that fits the most chairs rather than the one that supports the agenda. A room can appear spacious yet remain unsuitable if participants cannot see the presenter, reach a writing surface, hear one another, or move between activities.
Step 2: Compare the Main Breakout Room Layouts

Use this table as a starting point, not a fixed specification. Actual suitability depends on room dimensions, furniture, doors, columns, displays, power, and the production plan. For broader conference room setup guidance, align the layout with lighting, acoustics, connectivity, and workflow.
| Layout | Best use | Strengths | Limitations | AV considerations |
|---|---|---|---|---|
| Classroom | Training and seminars | Work surface and forward-facing view | Rows can restrict discussion and circulation | Front display, presenter microphone, content connection |
| Theater | Briefings and presentations | Efficient forward-facing attention | Little writing space and limited group work | Clear screen sightlines and speech reinforcement |
| Boardroom | Executive or team discussions | Direct eye contact | Table depth can affect camera angles | Table microphones, display visibility, camera coverage |
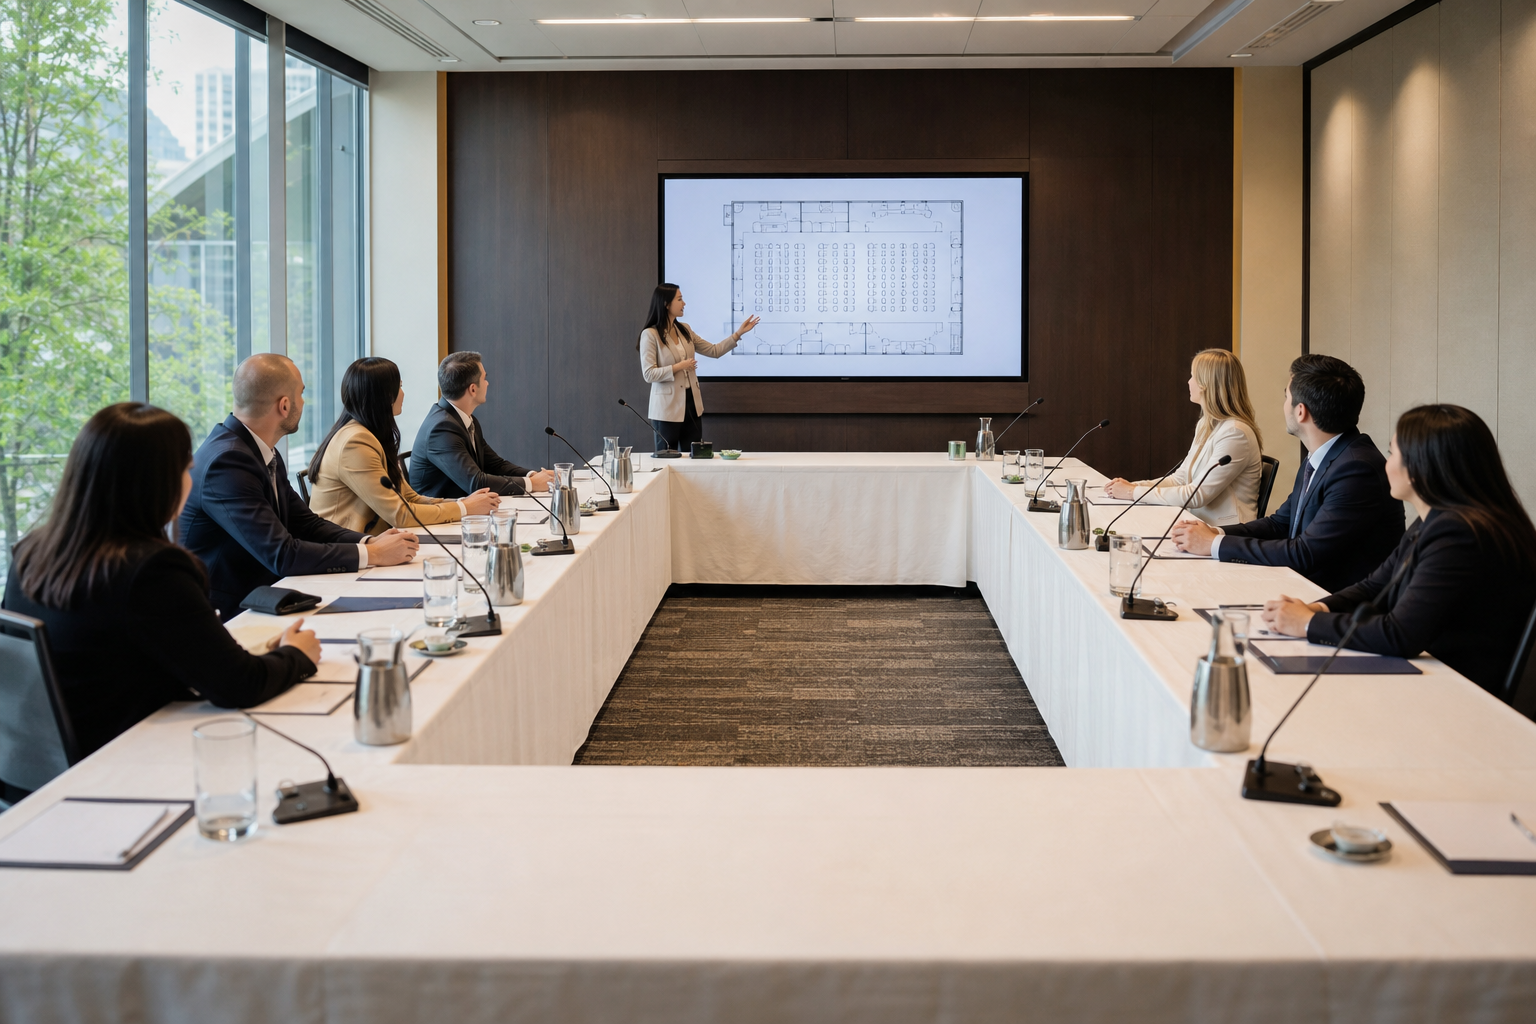
| Hollow square | Discussion and shared work | Open centre and direct interaction | Uses more floor area | Microphone pickup around the table and clear displays |
| U-shape | Facilitated discussion and instruction | Open front and facilitator access | Side seats may have angled views | Presenter position, screen angle, microphone coverage |
| Collaborative pods | Workshops and brainstorming | Supports small-group participation | Can create noise and congestion | Content sharing and, where needed, pod-level audio or displays |
Classroom and Theater Layouts: Prioritize Presentation and Training
Classroom seating is the better starting point when attendees need to write, use laptops, review worksheets, or complete structured exercises. Leave enough space for the facilitator to reach each row and for attendees to enter and leave without interrupting the session.
Theater seating suits presentation, briefing, or demonstration-led agendas. It creates focus, but becomes a weak choice when participants must collaborate, take extensive notes, or turn frequently toward one another. Always check the view from the farthest seat, not only from the centre of the first row.
For either format, position the presenter, main display, and any confidence monitor so attendees are not forced to choose between watching the speaker and viewing content. Keep aisles clear and confirm that accessible seating provides an equivalent view and route.
Boardroom, Hollow Square, and U-Shape: Support Discussion
Boardroom layouts work when a group needs direct eye contact around one shared table. They suit focused decision-making and leadership discussions, but the table can limit camera placement and make content harder to view at a comfortable angle.
A hollow square preserves the conversational benefit of a shared table while creating an open centre for a facilitator, materials, or a demonstration. A U-shape offers a similar sense of connection with a clear presentation zone at the open end. It works well when a facilitator needs to move through the room, although participants on the sides may need angled displays.
When comparing these formats, check layout and sight lines from every position. Attendees should be able to see the presenter, shared content, and one another without twisting around furniture or sitting behind a screen.
Collaborative Pods: Design for Small-Group Work
Pods divide the room into small working groups. They suit brainstorming, facilitated exercises, case work, and sessions that alternate between discussion and reporting. Space groups so facilitators can circulate, participants can reach shared materials, and one conversation does not overwhelm another.
Plan how each group will report back. Options include returning to a central presenter, using a shared display, posting work on a wall, or reporting through a digital platform. In a hybrid session, determine how remote attendees join each group and whether each pod needs its own microphone, camera, display, or connection method.
Step 3: Check Sightlines, Accessibility, and Movement
Once you have a preferred layout, test the floor plan rather than relying on a generic diagram. Identify the farthest seat and confirm that the presenter and primary display remain visible. Then trace routes from the entrance to each seat, the facilitator’s path, and the transition route to another room.
- Keep entry, exit, and emergency routes clear.
- Provide an accessible route and seating position with an equivalent view and participation opportunity.
- Leave room for presenters, facilitators, and support staff to move safely.
- Separate catering, registration, materials, and equipment storage from high-traffic areas.
- Plan power and cable routes so they do not create trip hazards.
Stop point: If far seats cannot see the display, an aisle is blocked, or the facilitator cannot reach groups, revise the layout before assigning AV.
Step 4: Match Breakout Room AV to the Layout
Seating changes what the AV system must capture and show. A forward-facing room may need strong presenter audio and a clear main display. A boardroom requires pickup around the table. Pods may need several ways to share content or capture group discussion. Treat breakout room AV as a system of microphones, speakers, displays, cameras, control, and connectivity.
- Where will the presenter stand, and can the camera frame the presenter and room?
- Which seats or tables need microphones?
- Can attendees see shared content without blocking the presenter?
- How will presenters connect laptops, playback sources, or collaboration platforms?
- What backup inputs, adapters, batteries, or playback options are available?
- Who responds if a microphone, display, or connection fails?
Stop point: Do not finalize seating until the technical team confirms that audio pickup, camera framing, display placement, and presenter movement work together.
Step 5: Coordinate Parallel Breakout Sessions
For a larger conference, the breakout room is part of a route through the event. Plan how attendees leave the plenary, find their session, collect materials, access refreshments, and return for the next program block. Signage should answer the next question before attendees reach a decision point.
Ask the venue to map room assignments, registration, catering, rest areas, staging, and transition times on one floor plan. Mississauga Convention Centre offers seven halls of approximately 4,250 square feet each, total capacity exceeding 2,200 guests, and in-house AV, lighting, staging, and technical support. The appropriate configuration still depends on the agenda, attendance, furniture, staging footprint, and traffic pattern.
For multi-room planning, ask about parallel breakout sessions, noise separation, room resets, speaker support, catering timing, and how quickly rooms can change between agenda blocks.
Step 6: Validate the Layout Before Event Day
- Walk the planned entrance, seating, presenter, catering, and exit routes.
- Test the farthest sightline from each important seating zone.
- Sit in representative positions and check the display, presenter, and other attendees.
- Test microphones, speakers, cameras, displays, content sharing, and remote participation.
- Ask the presenter to move through the session and confirm that furniture does not restrict delivery.
- Rehearse the transition from plenary to breakout and back again.
- Save the approved floor plan and distribute it to the venue, production team, facilitators, and registration staff.
Final stop point: If rehearsal exposes poor audio, blocked sightlines, difficult movement, or unclear room assignments, change the plan before event day.
Breakout Layout Briefing Checklist for a Venue
- Session objective and agenda activities
- Expected in-room and remote attendance
- Preferred layout and acceptable alternatives
- Furniture, writing surfaces, staging, and presenter space
- Farthest-seat sightline and display requirements
- Accessible seating, routes, and participation needs
- Microphone, speaker, camera, display, connectivity, and backup requirements
- Registration, materials, catering, signage, and storage locations
- Plenary-to-breakout transition plan and timing
- Technical rehearsal, day-of support, and final floor-plan approval process
A Fast Decision Path for Common Meeting Formats
| Meeting format | Starting layout | Main tradeoff |
|---|---|---|
| Keynote or briefing | Theater | Strong presentation focus, limited workspace |
| Classroom training | Classroom | Useful work surface, less spontaneous interaction |
| Executive discussion | Boardroom | Direct eye contact, more challenging camera coverage |
| Facilitated workshop | U-shape or pods | Better interaction, more floor space and AV planning |
| Rotating small-group activity | Collaborative pods | Flexible participation, possible noise and congestion |
| Hybrid breakout | Layout selected around camera, audio, and display needs | Requires deliberate remote participation planning |
Frequently Asked Questions
Can one breakout room layout support presentations and group discussion?
Yes, if the agenda gives each activity enough usable space and the room can change without disrupting the program. A U-shape can support presentation and discussion, while pods can support group work followed by reports.
How do hybrid meetings change breakout room planning?
Hybrid planning requires clear audio from presenters and participants, a consistent view of shared content, and an intentional way for remote attendees to join group work. Test camera framing, microphone pickup, displays, connectivity, and speaker handoffs.
What should I ask a venue about parallel breakout sessions?
Ask which rooms can be combined or separated, how attendees will move between them, where registration and catering will sit, how signage will work, and who manages resets. Confirm AV, lighting, staging, technical support, rehearsal, and final floor plans.
Choose the Layout That Supports the Work
Start with the activity, not the furniture. Theater and classroom layouts favour presentation and instruction, discussion layouts protect eye contact, and pods create space for collaboration. The final choice must also work for sightlines, accessibility, movement, AV, remote participation, and room transitions.
For a conference or corporate program in Mississauga, bring your agenda, attendance estimate, preferred formats, and technical requirements to the venue discussion. Mississauga Convention Centre offers seven halls, in-house AV, lighting, staging, and technical support for planners evaluating room combinations and breakout requirements.